
SEASON 8 PVE
AOE HEALER
LIFE STAFF GUIDE
AOE HEALER
LIFE STAFF GUIDE

Orb of Protection

Beacon

Sacred Ground

1. Starter Gear


1. Starter Gear


1. Starter Gear

Items
Items used in this build are just examples of good perk combinations you can use. There may be multiple Named Item alternatives, or you might find something similar on the Trading Post—or even get lucky with drops from mobs or chests. You can find all viable alternatives on websites like NWBuddy or NWDB.
Once you reach level 65, focus on increasing your faction level. At max faction rank, you’ll gain access to excellent starter gear. And if you didn’t spend much gold while leveling, you should be able to afford it easily. This gear is more than enough to handle M2 expeditions, Hive of the Gorgon, and Trial of the Devourer. The last one can be a bit tricky. It all depends on the raid leader and how strict the gear check is.
This guide uses Covenant gear as an example, but similar alternatives exist for Syndicat and Marauders. Base faction gear comes with Constitution as the default attribute, but you can buy seals to change it to any attribute you prefer.
Purchase a Covenant (Syndicat/Marauder) Sage Seal from the faction store, then take it to the Outfitting Station along with the items you want to upgrade.
Focus on a few key things:
Attributes: Ensure your gear has the right attributes for your build. For example, avoid using DEX/STR pieces for a healer or FOC pieces for damage dealers.
Weight: Stay in the correct armor weight category. In most cases, avoid medium weight as a DPS or healer. Tanks should aim for heavy armor.
Perks: Prioritize your main protection perk first (usually Enchanted Ward). Then add Refreshing and relevant weapon perks to complete your build.
Gear Score: Make sure your gear score meets the requirements for expeditions:
650 for M1
675 for M2
695 for M3 (If your gear score is below these thresholds, the game will artificially scale down your outgoing damage.)
This is how your gear could look like by the end of week 1:

Covenant Paladin Headwear
Light
Named
Gear Score
675
Attribute
30
FOC


Health
+2.4% max health.

Enchanted Ward
-4% damage from light and heavy attacks.

Refreshing
Reduce max cooldowns by 4%.

Note : Use gems for protection based on mutation type Ruby - Fire, Aquamarine - Ice, Amethyst - Void, Amber - Nature

Covenant Paladin Headwear
Light
Named
Gear Score
675
Attribute
30
FOC


Health
+2.4% max health.

Enchanted Ward
-4% damage from light and heavy attacks.

Refreshing
Reduce max cooldowns by 4%.

Note : Use gems for protection based on mutation type Ruby - Fire, Aquamarine - Ice, Amethyst - Void, Amber - Nature

Covenant Paladin Headwear
Light
Named
Gear Score
675
Attribute
30
FOC


Health
+2.4% max health.

Enchanted Ward
-4% damage from light and heavy attacks.

Refreshing
Reduce max cooldowns by 4%.

Note : Use gems for protection based on mutation type Ruby - Fire, Aquamarine - Ice, Amethyst - Void, Amber - Nature

Covenant Paladin Jacket
Light
Named
Gear Score
675
Attribute
30
FOC


Health
+2.4% max health.

Enchanted Ward
-4% damage from light and heavy attacks.

Refreshing
Reduce max cooldowns by 4%.

Note : Use gems for protection based on mutation type Ruby - Fire, Aquamarine - Ice, Amethyst - Void, Amber - Nature

Covenant Paladin Jacket
Light
Named
Gear Score
675
Attribute
30
FOC


Health
+2.4% max health.

Enchanted Ward
-4% damage from light and heavy attacks.

Refreshing
Reduce max cooldowns by 4%.

Note : Use gems for protection based on mutation type Ruby - Fire, Aquamarine - Ice, Amethyst - Void, Amber - Nature

Covenant Paladin Jacket
Light
Named
Gear Score
675
Attribute
30
FOC


Health
+2.4% max health.

Enchanted Ward
-4% damage from light and heavy attacks.

Refreshing
Reduce max cooldowns by 4%.

Note : Use gems for protection based on mutation type Ruby - Fire, Aquamarine - Ice, Amethyst - Void, Amber - Nature

Covenant Paladin Handcovers
Light
Named
Gear Score
675
Attribute
30
FOC


Health
+2.4% max health.

Enchanted Ward
-4% damage from light and heavy attacks.

Refreshing
Reduce max cooldowns by 4%.

Note : Use gems for protection based on mutation type Ruby - Fire, Aquamarine - Ice, Amethyst - Void, Amber - Nature

Covenant Paladin Handcovers
Light
Named
Gear Score
675
Attribute
30
FOC


Health
+2.4% max health.

Enchanted Ward
-4% damage from light and heavy attacks.

Refreshing
Reduce max cooldowns by 4%.

Note : Use gems for protection based on mutation type Ruby - Fire, Aquamarine - Ice, Amethyst - Void, Amber - Nature

Covenant Paladin Handcovers
Light
Named
Gear Score
675
Attribute
30
FOC


Health
+2.4% max health.

Enchanted Ward
-4% damage from light and heavy attacks.

Refreshing
Reduce max cooldowns by 4%.

Note : Use gems for protection based on mutation type Ruby - Fire, Aquamarine - Ice, Amethyst - Void, Amber - Nature
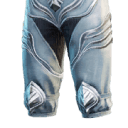
Attuned Leather Pants
Medium
Artifact
Gear Score
725
Attribute
45
MAG

Well Rounded
+11 to all attributes.


Refreshing
Reduce max cooldowns by 4%.

Elemental Aversion
Receive 4.5% less damage from ranged, elemental attacks.

Mortal Refreshment
Reduce all cooldowns by 8% on kill (1s cooldown).

Note : Use gems for protection based on mutation type Ruby - Fire, Aquamarine - Ice, Amethyst - Void, Amber - Nature

Attuned Leather Pants
Medium
Artifact
Gear Score
725
Attribute
45
MAG

Well Rounded
+11 to all attributes.


Refreshing
Reduce max cooldowns by 4%.

Elemental Aversion
Receive 4.5% less damage from ranged, elemental attacks.

Mortal Refreshment
Reduce all cooldowns by 8% on kill (1s cooldown).

Note : Use gems for protection based on mutation type Ruby - Fire, Aquamarine - Ice, Amethyst - Void, Amber - Nature

Attuned Leather Pants
Medium
Artifact
Gear Score
725
Attribute
45
MAG

Well Rounded
+11 to all attributes.


Refreshing
Reduce max cooldowns by 4%.

Elemental Aversion
Receive 4.5% less damage from ranged, elemental attacks.

Mortal Refreshment
Reduce all cooldowns by 8% on kill (1s cooldown).

Note : Use gems for protection based on mutation type Ruby - Fire, Aquamarine - Ice, Amethyst - Void, Amber - Nature

Covenant Paladin Shoes
Medium
Named
Gear Score
675
Attribute
30
FOC


Health
+2.4% max health.

Enchanted Ward
-4% damage from light and heavy attacks.

Refreshing
Reduce max cooldowns by 4%.

Note : Use gems for protection based on mutation type Ruby - Fire, Aquamarine - Ice, Amethyst - Void, Amber - Nature

Covenant Paladin Shoes
Medium
Named
Gear Score
675
Attribute
30
FOC


Health
+2.4% max health.

Enchanted Ward
-4% damage from light and heavy attacks.

Refreshing
Reduce max cooldowns by 4%.

Note : Use gems for protection based on mutation type Ruby - Fire, Aquamarine - Ice, Amethyst - Void, Amber - Nature

Covenant Paladin Shoes
Medium
Named
Gear Score
675
Attribute
30
FOC


Health
+2.4% max health.

Enchanted Ward
-4% damage from light and heavy attacks.

Refreshing
Reduce max cooldowns by 4%.

Note : Use gems for protection based on mutation type Ruby - Fire, Aquamarine - Ice, Amethyst - Void, Amber - Nature

Covenant Paladin Life Staff
Named
Gear Score
725
Attribute
35
FOC


Enchanted
Light and Heavy attacks deal +5% damage.

Blessed
+12% outgoing healing efficiency.

Refreshing Move
Light and Heavy attacks reduce your active weapon cooldowns by 2.5% (0.2s cooldown).


No Runeglass
Cut Pristine Diamond

Covenant Paladin Life Staff
Named
Gear Score
725
Attribute
35
FOC


Enchanted
Light and Heavy attacks deal +5% damage.

Blessed
+12% outgoing healing efficiency.

Refreshing Move
Light and Heavy attacks reduce your active weapon cooldowns by 2.5% (0.2s cooldown).


No Runeglass
Cut Pristine Diamond

Covenant Paladin Life Staff
Named
Gear Score
725
Attribute
35
FOC


Enchanted
Light and Heavy attacks deal +5% damage.

Blessed
+12% outgoing healing efficiency.

Refreshing Move
Light and Heavy attacks reduce your active weapon cooldowns by 2.5% (0.2s cooldown).


No Runeglass
Cut Pristine Diamond

Covenant Paladin Void Gauntlet
Named
Gear Score
725
Attribute
17
FOC+INT


Enchanted
Light and Heavy attacks deal +5% damage.

Keen
+7% critical chance.

Vicious
+7% critical damage.


No Runeglass
Cut Pristine Diamond

Covenant Paladin Void Gauntlet
Named
Gear Score
725
Attribute
17
FOC+INT


Enchanted
Light and Heavy attacks deal +5% damage.

Keen
+7% critical chance.

Vicious
+7% critical damage.


No Runeglass
Cut Pristine Diamond

Covenant Paladin Void Gauntlet
Named
Gear Score
725
Attribute
17
FOC+INT


Enchanted
Light and Heavy attacks deal +5% damage.

Keen
+7% critical chance.

Vicious
+7% critical damage.


No Runeglass
Cut Pristine Diamond

Amulet
Crafted
Gear Score
650+
Attribute
28
MAG


Health
+7% max Health.

Empowered
Empower you apply lasts 34% longer.

Note : Use gems for protection based on mutation type Ruby - Fire, Aquamarine - Ice, Amethyst - Void, Amber - Nature

Amulet
Crafted
Gear Score
650+
Attribute
28
MAG


Health
+7% max Health.

Empowered
Empower you apply lasts 34% longer.

Note : Use gems for protection based on mutation type Ruby - Fire, Aquamarine - Ice, Amethyst - Void, Amber - Nature

Amulet
Crafted
Gear Score
650+
Attribute
28
MAG


Health
+7% max Health.

Empowered
Empower you apply lasts 34% longer.

Note : Use gems for protection based on mutation type Ruby - Fire, Aquamarine - Ice, Amethyst - Void, Amber - Nature

Ring
Crafted
Gear Score
650+
Attribute
28
MAG


Hearty
+10% max Stamina.

sacred
+9.5% outgoing healing efficiency.

Note : Use gems for protection based on mutation type Ruby - Fire, Aquamarine - Ice, Amethyst - Void, Amber - Nature

Ring
Crafted
Gear Score
650+
Attribute
28
MAG


Hearty
+10% max Stamina.

sacred
+9.5% outgoing healing efficiency.

Note : Use gems for protection based on mutation type Ruby - Fire, Aquamarine - Ice, Amethyst - Void, Amber - Nature

Ring
Crafted
Gear Score
650+
Attribute
28
MAG


Hearty
+10% max Stamina.

sacred
+9.5% outgoing healing efficiency.

Note : Use gems for protection based on mutation type Ruby - Fire, Aquamarine - Ice, Amethyst - Void, Amber - Nature

Earring
Crafted
Gear Score
650+
Attribute
28
MAG

Empowering Toast
On Potion Drink: Gain 10% Empower for 8s (10s cooldown).

Refreshing Toast
Potions cooldown 10% faster.

Note : Use gems for protection based on mutation type Ruby - Fire, Aquamarine - Ice, Amethyst - Void, Amber - Nature

Earring
Crafted
Gear Score
650+
Attribute
28
MAG

Empowering Toast
On Potion Drink: Gain 10% Empower for 8s (10s cooldown).

Refreshing Toast
Potions cooldown 10% faster.

Note : Use gems for protection based on mutation type Ruby - Fire, Aquamarine - Ice, Amethyst - Void, Amber - Nature

Earring
Crafted
Gear Score
650+
Attribute
28
MAG

Empowering Toast
On Potion Drink: Gain 10% Empower for 8s (10s cooldown).

Refreshing Toast
Potions cooldown 10% faster.

Note : Use gems for protection based on mutation type Ruby - Fire, Aquamarine - Ice, Amethyst - Void, Amber - Nature
First Upgrades:
This variation of the gear transitional and can be skiped towards endgame variation to save some gold on upgrades. I just wanna share all available options. If you want to use Rune Forge gear you will be slightly less optiamal on armor because of your helmet, which is light. But I would not recommend to change it. In future when you start running Hive you want all your pieces be light, only keeping shoes as medium. Always check the market, there might be cheap alternatives with similar perks.
As first step on impoving your gear you should consider running Winter Rune Forge. If you are lucky It can drop you upgradable sandals, gloves and coat
upgrade Sandals spear with enchanted ward
upgrade Gloves with refreshing or leave it as it is to save some gold
upgrade Coat with enchanted ward
In order to upgrade those items you will need
x9 chromatics seals from faction store which is equal to 45k gold. Doing your daily random runs should give you 42k by the end of the week.
x3 armor matrixes. This one various in price. On current date it is around 8k gold per one
x2 harden crystal (for enchanted ward). This one various in price. On current date it is around 6k gold per one
Tip: Keep doing your daily random expeditions and mutated expeditions to get gold to buy chromatic seals from the faction store. This is how your gear could look by the end of week 2 - week 3 of your endgame (changed items are highlited)
Remember. You can skip this variation and start doing Hive of Gorgon in your faction gear saving gold on upgrading Hoplite pieces to make Best in Slot 725 engame gear. But if not in a rush and happy to take game slow feel free to use those items in your gear

Covenant Paladin Headwear
Light
Named
Gear Score
675
Attribute
30
FOC


Health
+2.4% max health.

Enchanted Ward
-4% damage from light and heavy attacks.

Refreshing
Reduce max cooldowns by 4%.

Note : Use gems for protection based on mutation type Ruby - Fire, Aquamarine - Ice, Amethyst - Void, Amber - Nature

Covenant Paladin Headwear
Light
Named
Gear Score
675
Attribute
30
FOC


Health
+2.4% max health.

Enchanted Ward
-4% damage from light and heavy attacks.

Refreshing
Reduce max cooldowns by 4%.

Note : Use gems for protection based on mutation type Ruby - Fire, Aquamarine - Ice, Amethyst - Void, Amber - Nature

Covenant Paladin Headwear
Light
Named
Gear Score
675
Attribute
30
FOC


Health
+2.4% max health.

Enchanted Ward
-4% damage from light and heavy attacks.

Refreshing
Reduce max cooldowns by 4%.

Note : Use gems for protection based on mutation type Ruby - Fire, Aquamarine - Ice, Amethyst - Void, Amber - Nature

Frostweaver Coat
Light
Named
Gear Score
700
Attribute
32
FOC


Health
+2.4% max health.

Mending Protection
+27% outgoing healing power for 3s if Orb of Protection heals an ally below 50% Health.

Enchanted Ward
-4% damage from light and heavy attacks.

Note : Use gems for protection based on mutation type Ruby - Fire, Aquamarine - Ice, Amethyst - Void, Amber - Nature

Frostweaver Coat
Light
Named
Gear Score
700
Attribute
32
FOC


Health
+2.4% max health.

Mending Protection
+27% outgoing healing power for 3s if Orb of Protection heals an ally below 50% Health.

Enchanted Ward
-4% damage from light and heavy attacks.

Note : Use gems for protection based on mutation type Ruby - Fire, Aquamarine - Ice, Amethyst - Void, Amber - Nature

Frostweaver Coat
Light
Named
Gear Score
700
Attribute
32
FOC


Health
+2.4% max health.

Mending Protection
+27% outgoing healing power for 3s if Orb of Protection heals an ally below 50% Health.

Enchanted Ward
-4% damage from light and heavy attacks.

Note : Use gems for protection based on mutation type Ruby - Fire, Aquamarine - Ice, Amethyst - Void, Amber - Nature

Frostweaver Gloves
Light
Named
Gear Score
700
Attribute
32
FOC


Physical Aversion
Receive 4.5% less damage from ranged, physical attacks.

Keen Beacon
When Beacon heals a player, they gain 6.7% critical chance for 6s.

Refreshing
Reduce max cooldowns by 4%.

Note : Use gems for protection based on mutation type Ruby - Fire, Aquamarine - Ice, Amethyst - Void, Amber - Nature

Frostweaver Gloves
Light
Named
Gear Score
700
Attribute
32
FOC


Physical Aversion
Receive 4.5% less damage from ranged, physical attacks.

Keen Beacon
When Beacon heals a player, they gain 6.7% critical chance for 6s.

Refreshing
Reduce max cooldowns by 4%.

Note : Use gems for protection based on mutation type Ruby - Fire, Aquamarine - Ice, Amethyst - Void, Amber - Nature

Frostweaver Gloves
Light
Named
Gear Score
700
Attribute
32
FOC


Physical Aversion
Receive 4.5% less damage from ranged, physical attacks.

Keen Beacon
When Beacon heals a player, they gain 6.7% critical chance for 6s.

Refreshing
Reduce max cooldowns by 4%.

Note : Use gems for protection based on mutation type Ruby - Fire, Aquamarine - Ice, Amethyst - Void, Amber - Nature

Attuned Leather Pants
Medium
Artifact
Gear Score
725
Attribute
45
MAG

Well Rounded
+11 to all attributes.


Refreshing
Reduce max cooldowns by 4%.

Elemental Aversion
Receive 4.5% less damage from ranged, elemental attacks.

Mortal Refreshment
Reduce all cooldowns by 8% on kill (1s cooldown).

Note : Use gems for protection based on mutation type Ruby - Fire, Aquamarine - Ice, Amethyst - Void, Amber - Nature

Attuned Leather Pants
Medium
Artifact
Gear Score
725
Attribute
45
MAG

Well Rounded
+11 to all attributes.


Refreshing
Reduce max cooldowns by 4%.

Elemental Aversion
Receive 4.5% less damage from ranged, elemental attacks.

Mortal Refreshment
Reduce all cooldowns by 8% on kill (1s cooldown).

Note : Use gems for protection based on mutation type Ruby - Fire, Aquamarine - Ice, Amethyst - Void, Amber - Nature

Attuned Leather Pants
Medium
Artifact
Gear Score
725
Attribute
45
MAG

Well Rounded
+11 to all attributes.


Refreshing
Reduce max cooldowns by 4%.

Elemental Aversion
Receive 4.5% less damage from ranged, elemental attacks.

Mortal Refreshment
Reduce all cooldowns by 8% on kill (1s cooldown).

Note : Use gems for protection based on mutation type Ruby - Fire, Aquamarine - Ice, Amethyst - Void, Amber - Nature

Frostweaver Sandals
Light
Named
Gear Score
700
Attribute
32
FOC


Refreshing
Reduce max cooldowns by 4%.

Nullifying Oblivion
When activated, Oblivion removes limited duration buffs from enemies within its radius and the cooldown is reduced by 10%.

Enchanted Ward
-4% damage from light and heavy attacks.

Note : Use gems for protection based on mutation type Ruby - Fire, Aquamarine - Ice, Amethyst - Void, Amber - Nature

Frostweaver Sandals
Light
Named
Gear Score
700
Attribute
32
FOC


Refreshing
Reduce max cooldowns by 4%.

Nullifying Oblivion
When activated, Oblivion removes limited duration buffs from enemies within its radius and the cooldown is reduced by 10%.

Enchanted Ward
-4% damage from light and heavy attacks.

Note : Use gems for protection based on mutation type Ruby - Fire, Aquamarine - Ice, Amethyst - Void, Amber - Nature

Frostweaver Sandals
Light
Named
Gear Score
700
Attribute
32
FOC


Refreshing
Reduce max cooldowns by 4%.

Nullifying Oblivion
When activated, Oblivion removes limited duration buffs from enemies within its radius and the cooldown is reduced by 10%.

Enchanted Ward
-4% damage from light and heavy attacks.

Note : Use gems for protection based on mutation type Ruby - Fire, Aquamarine - Ice, Amethyst - Void, Amber - Nature

Covenant Paladin Life Staff
Named
Gear Score
725
Attribute
35
FOC


Enchanted
Light and Heavy attacks deal +5% damage.

Blessed
+12% outgoing healing efficiency.

Refreshing Move
Light and Heavy attacks reduce your active weapon cooldowns by 2.5% (0.2s cooldown).


No Runeglass
Cut Pristine Diamond

Covenant Paladin Life Staff
Named
Gear Score
725
Attribute
35
FOC


Enchanted
Light and Heavy attacks deal +5% damage.

Blessed
+12% outgoing healing efficiency.

Refreshing Move
Light and Heavy attacks reduce your active weapon cooldowns by 2.5% (0.2s cooldown).


No Runeglass
Cut Pristine Diamond

Covenant Paladin Life Staff
Named
Gear Score
725
Attribute
35
FOC


Enchanted
Light and Heavy attacks deal +5% damage.

Blessed
+12% outgoing healing efficiency.

Refreshing Move
Light and Heavy attacks reduce your active weapon cooldowns by 2.5% (0.2s cooldown).


No Runeglass
Cut Pristine Diamond

Covenant Paladin Void Gauntlet
Named
Gear Score
725
Attribute
17
FOC+INT


Enchanted
Light and Heavy attacks deal +5% damage.

Keen
+7% critical chance.

Vicious
+7% critical damage.


No Runeglass
Cut Pristine Diamond

Covenant Paladin Void Gauntlet
Named
Gear Score
725
Attribute
17
FOC+INT


Enchanted
Light and Heavy attacks deal +5% damage.

Keen
+7% critical chance.

Vicious
+7% critical damage.


No Runeglass
Cut Pristine Diamond

Covenant Paladin Void Gauntlet
Named
Gear Score
725
Attribute
17
FOC+INT


Enchanted
Light and Heavy attacks deal +5% damage.

Keen
+7% critical chance.

Vicious
+7% critical damage.


No Runeglass
Cut Pristine Diamond

Amulet
Crafted
Gear Score
650+
Attribute
28
MAG


Health
+7% max Health.

Empowered
Empower you apply lasts 34% longer.

Note : Use gems for protection based on mutation type Ruby - Fire, Aquamarine - Ice, Amethyst - Void, Amber - Nature

Amulet
Crafted
Gear Score
650+
Attribute
28
MAG


Health
+7% max Health.

Empowered
Empower you apply lasts 34% longer.

Note : Use gems for protection based on mutation type Ruby - Fire, Aquamarine - Ice, Amethyst - Void, Amber - Nature

Amulet
Crafted
Gear Score
650+
Attribute
28
MAG


Health
+7% max Health.

Empowered
Empower you apply lasts 34% longer.

Note : Use gems for protection based on mutation type Ruby - Fire, Aquamarine - Ice, Amethyst - Void, Amber - Nature

Ring
Crafted
Gear Score
650+
Attribute
28
MAG


Hearty
+10% max Stamina.

sacred
+9.5% outgoing healing efficiency.

Note : Use gems for protection based on mutation type Ruby - Fire, Aquamarine - Ice, Amethyst - Void, Amber - Nature

Ring
Crafted
Gear Score
650+
Attribute
28
MAG


Hearty
+10% max Stamina.

sacred
+9.5% outgoing healing efficiency.

Note : Use gems for protection based on mutation type Ruby - Fire, Aquamarine - Ice, Amethyst - Void, Amber - Nature

Ring
Crafted
Gear Score
650+
Attribute
28
MAG


Hearty
+10% max Stamina.

sacred
+9.5% outgoing healing efficiency.

Note : Use gems for protection based on mutation type Ruby - Fire, Aquamarine - Ice, Amethyst - Void, Amber - Nature

Earring
Crafted
Gear Score
650+
Attribute
28
MAG

Empowering Toast
On Potion Drink: Gain 10% Empower for 8s (10s cooldown).

Refreshing Toast
Potions cooldown 10% faster.

Note : Use gems for protection based on mutation type Ruby - Fire, Aquamarine - Ice, Amethyst - Void, Amber - Nature

Earring
Crafted
Gear Score
650+
Attribute
28
MAG

Empowering Toast
On Potion Drink: Gain 10% Empower for 8s (10s cooldown).

Refreshing Toast
Potions cooldown 10% faster.

Note : Use gems for protection based on mutation type Ruby - Fire, Aquamarine - Ice, Amethyst - Void, Amber - Nature

Earring
Crafted
Gear Score
650+
Attribute
28
MAG

Empowering Toast
On Potion Drink: Gain 10% Empower for 8s (10s cooldown).

Refreshing Toast
Potions cooldown 10% faster.

Note : Use gems for protection based on mutation type Ruby - Fire, Aquamarine - Ice, Amethyst - Void, Amber - Nature

2. Perks for Healer build


2. Perks for Healer build


2. Perks for Healer build

Armor Perks

Enchanted Ward
-4% damage from light and heavy attacks.

Enchanted Ward
-4% damage from light and heavy attacks.

Enchanted Ward
-4% damage from light and heavy attacks.
Most of incoming damage, especially in boss fight, coded as light or heavy attacks. Enchanted ward reduces damage taken from it by a flat % on that armor piece. Essential for mutation expeditions to mitigate high mob damage.

Refreshing
Reduce max cooldowns by 4%.

Refreshing
Reduce max cooldowns by 4%.

Refreshing
Reduce max cooldowns by 4%.
Reduces cooldowns on abilities by a small percentage. Helps maintain higher skill uptime, especially useful for rotation-heavy DPS builds and support roles.

Mending Protection
+27% outgoing healing power for 3s if Orb of Protection heals an ally below 50% Health.

Mending Protection
+27% outgoing healing power for 3s if Orb of Protection heals an ally below 50% Health.

Mending Protection
+27% outgoing healing power for 3s if Orb of Protection heals an ally below 50% Health.
Boosts your healing when applying Orb of Protection, making it a strong value perk for passive group sustain

Nullifying Oblivion
When activated, Oblivion removes limited duration buffs from enemies within its radius and the cooldown is reduced by 10%.

Nullifying Oblivion
When activated, Oblivion removes limited duration buffs from enemies within its radius and the cooldown is reduced by 10%.

Nullifying Oblivion
When activated, Oblivion removes limited duration buffs from enemies within its radius and the cooldown is reduced by 10%.
Can cleanse buffs such as fortify and empower from mobs

Keen Beacon
When Beacon heals a player, they gain 6.7% critical chance for 6s.

Keen Beacon
When Beacon heals a player, they gain 6.7% critical chance for 6s.

Keen Beacon
When Beacon heals a player, they gain 6.7% critical chance for 6s.
Crit Chanse is important in backless boss fights or big clumps

Health
+2.4% max health.

Health
+2.4% max health.

Health
+2.4% max health.
Increases your max HP based on the armor piece it’s on. Offers passive survivability for all roles, especially useful for light armor players or low-CON builds.

Mortal Power
Gain 12% Empowered for 20s on kill (1s cooldown).

Mortal Power
Gain 12% Empowered for 20s on kill (1s cooldown).

Mortal Power
Gain 12% Empowered for 20s on kill (1s cooldown).

Mortal Fortification
Gain 22% Fortify for 20s on kill (1s cooldown).

Mortal Fortification
Gain 22% Fortify for 20s on kill (1s cooldown).

Mortal Fortification
Gain 22% Fortify for 20s on kill (1s cooldown).

Mortal Refreshment
Reduce all cooldowns by 8% on kill (1s cooldown).

Mortal Refreshment
Reduce all cooldowns by 8% on kill (1s cooldown).

Mortal Refreshment
Reduce all cooldowns by 8% on kill (1s cooldown).
A very interesting change introduced in Season 8 is that Mortal perks are now available on armor pieces. Having one or a combination of these perks on your armor can help increase your damage or sustain. They’re mostly useless in boss fights, but can provide good value when dealing with large packs of mobs.
Value of it is not big but could be used on armor without taking important weapon perks which makes it usefull. Mortal refreshment or Mortal fortification could be options for healer build
Life Staff Perks

Blessed
+12% outgoing healing efficiency.

Blessed
+12% outgoing healing efficiency.

Blessed
+12% outgoing healing efficiency.
Increases healer power

Refreshing Move
Light and Heavy attacks reduce your active weapon cooldowns by 2.5% (0.2s cooldown).

Refreshing Move
Light and Heavy attacks reduce your active weapon cooldowns by 2.5% (0.2s cooldown).

Refreshing Move
Light and Heavy attacks reduce your active weapon cooldowns by 2.5% (0.2s cooldown).
Even tho you mostly should be using void gauntlet in some situations swaping to lifestaff with Refreshing Move can help get cooldowns back faster to save the fight

Fortifying Sacred Ground
Allies healed by Sacred Ground gain Fortify, increasing armor by 17% for 5s.

Fortifying Sacred Ground
Allies healed by Sacred Ground gain Fortify, increasing armor by 17% for 5s.

Fortifying Sacred Ground
Allies healed by Sacred Ground gain Fortify, increasing armor by 17% for 5s.
Provides fortify for better sustain in fights
Void Gauntlet Perks

Distained Infliction
Potency of outgoing DoTs are increased by 15%. Hitting a target inflicted by your DoTs will extend the duration of them by 5% (1s Cooldown.) PvE Only: Deal +5% base damage against hostile AI inflicted with DoTs.

Distained Infliction
Potency of outgoing DoTs are increased by 15%. Hitting a target inflicted by your DoTs will extend the duration of them by 5% (1s Cooldown.) PvE Only: Deal +5% base damage against hostile AI inflicted with DoTs.

Distained Infliction
Potency of outgoing DoTs are increased by 15%. Hitting a target inflicted by your DoTs will extend the duration of them by 5% (1s Cooldown.) PvE Only: Deal +5% base damage against hostile AI inflicted with DoTs.
A PvE-exclusive perk that increases your DoTs damage and adds 5% more consistent damage to light attacks and abilities

Putrefying Scream
Petrifying Scream inflicts Disease on hit, reducing the target's incoming healing by 43% and outgoing healing by 21% for 8s.

Putrefying Scream
Petrifying Scream inflicts Disease on hit, reducing the target's incoming healing by 43% and outgoing healing by 21% for 8s.

Putrefying Scream
Petrifying Scream inflicts Disease on hit, reducing the target's incoming healing by 43% and outgoing healing by 21% for 8s.
Very usefull in mutations with healing modifiers and in specific boss fights. e.g Ennead Anpu and Heru

Sundering Stacks
Attack inflicts a stack of 4% Rend, each stack lasting 6s. (Max 5 stacks)

Sundering Stacks
Attack inflicts a stack of 4% Rend, each stack lasting 6s. (Max 5 stacks)

Sundering Stacks
Attack inflicts a stack of 4% Rend, each stack lasting 6s. (Max 5 stacks)
Expensive
Applies Rend reducing enemy armor and significantly boosting your group’s overall damage output. Don't use more than one in a group

Flame Attunement
Attacks deal +14% weapon damage as Fire (1,5s cooldown. Does not trigger off persistent damage or DoT effects).

Flame Attunement
Attacks deal +14% weapon damage as Fire (1,5s cooldown. Does not trigger off persistent damage or DoT effects).

Flame Attunement
Attacks deal +14% weapon damage as Fire (1,5s cooldown. Does not trigger off persistent damage or DoT effects).

Arboreal Attunement
Attacks deal +14% weapon damage as Nature (1,5s cooldown. Does not trigger off persistent damage or DoT effects).

Arboreal Attunement
Attacks deal +14% weapon damage as Nature (1,5s cooldown. Does not trigger off persistent damage or DoT effects).

Arboreal Attunement
Attacks deal +14% weapon damage as Nature (1,5s cooldown. Does not trigger off persistent damage or DoT effects).

Frost Attunement
Attacks deal +14% weapon damage as Ice (1.5s cooldown. Does not trigger off persistent damage or DoT effects).

Frost Attunement
Attacks deal +14% weapon damage as Ice (1.5s cooldown. Does not trigger off persistent damage or DoT effects).

Frost Attunement
Attacks deal +14% weapon damage as Ice (1.5s cooldown. Does not trigger off persistent damage or DoT effects).

Abyssal Attunement
Attacks deal +14% weapon damage as Void (1.5s cooldown. Does not trigger off persistent damage or DoT effects).

Abyssal Attunement
Attacks deal +14% weapon damage as Void (1.5s cooldown. Does not trigger off persistent damage or DoT effects).

Abyssal Attunement
Attacks deal +14% weapon damage as Void (1.5s cooldown. Does not trigger off persistent damage or DoT effects).
Attunement could be a good additional single target damage as option instead of sundering stacks
Amulet Perks

Nature Protection
Receive 15% less Nature damage.

Nature Protection
Receive 15% less Nature damage.

Nature Protection
Receive 15% less Nature damage.

Void Protection
Receive 15% less Void damage.

Void Protection
Receive 15% less Void damage.

Void Protection
Receive 15% less Void damage.

Flame Protection
Receive 15% less Fire damage.

Flame Protection
Receive 15% less Fire damage.

Flame Protection
Receive 15% less Fire damage.

Frozen Protection
Receive 15% less Ice damage.

Frozen Protection
Receive 15% less Ice damage.

Frozen Protection
Receive 15% less Ice damage.
Nature, Fire, Void, and Ice are the four main elements you’ll encounter weekly in mutated expeditions. Having an amulet for each will keep you covered for endgame content. Keep in mind that the resistance cap is 50% (e.g., if you have 51% Nature resistance, only 50% will count). Slot your gems carefully to avoid exceeding the cap.

Slash Protection
Receive 15% less Slash damage.

Slash Protection
Receive 15% less Slash damage.

Slash Protection
Receive 15% less Slash damage.

Thrust Protection
Receive 15% less Thrust damage.

Thrust Protection
Receive 15% less Thrust damage.

Thrust Protection
Receive 15% less Thrust damage.

Strike Protection
Receive 15% less Strike damage.

Strike Protection
Receive 15% less Strike damage.

Strike Protection
Receive 15% less Strike damage.
Physical damage protection can help in boss fights that aren't affected by mutators. Check the NWBuddy website to see what damage type the bosses deal in the expedition you're running, and bring an extra amulet with that type of protection.
Jewelry Perks
Empowering Toast
On Potion Drink: Gain 10% Empower for 8s (10s cooldown).
Empowering Toast
On Potion Drink: Gain 10% Empower for 8s (10s cooldown).
Empowering Toast
On Potion Drink: Gain 10% Empower for 8s (10s cooldown).
Great for maximizing damage boosts during fights.
Fortifying Toast
On Potion Drink: Gain 20% Fortify for 8s (10s cooldown).
Fortifying Toast
On Potion Drink: Gain 20% Fortify for 8s (10s cooldown).
Fortifying Toast
On Potion Drink: Gain 20% Fortify for 8s (10s cooldown).
Useful for boosting survivability in high-damage encounters.

Hearty
+10% max Stamina.

Hearty
+10% max Stamina.

Hearty
+10% max Stamina.
Increases max stamina, allowing for more dodges. Eespecially valuable for light armor builds.

Regenerating
+0.52% Health every second.

Regenerating
+0.52% Health every second.

Regenerating
+0.52% Health every second.
Never use regenerating as Healer. Health regen from this perk will counts towards threat and cose agro which will make your tank job much harder

3. Starter Attributes


3. Starter Attributes


3. Starter Attributes

Attributes Details
Attributes are an important part of your build. They provide base damage scaling for your weapon and grant additional bonuses when you reach specific checkpoints. You can read about all attribute checkpoints by simply hovering over them in-game. When building your character, consider how those checkpoints synergize with your weapon.
Avoid investing points into Constitution, as it will lower your damage output and often won’t make a significant difference in survivability. Instead, focus on learning enemy mechanics and attack patterns to understand which damage you can safely take and which attacks you should always dodge.
If you upgrade your Attuned Leather Pants to Gear Score 725, and the rest of your items are 650+, you’ll have enough total attributes to reach both the 300 Foc and 300 Int checkpoints.
I would not recommend going lower than 300 Foc at the start. Reason for that - you will not be able to join random expeditions as a healer. Even tho most of the time that amount of healing is unnecessery in low level mutations game limitations set to 300 Foc for random q.
STR
15
DEX
15
INT
300
FOC
300
CON
15
STR
15
DEX
15
INT
300
FOC
300
CON
15
STR
15
DEX
15
INT
300
FOC
300
CON
15

4. Endgame Gear


4. Endgame Gear


4. Endgame Gear

Gear Progression
Once you've got your starter gear sorted, you can start working toward long-term goals. Focus on running Hive of the Gorgon and Trial of the Devourer—these endgame activities offer some of the best items in the game, and some drops can’t be obtained any other way.
Gear
Hoplite Mask and Hoplite Handcovers drop from Hive of the Gorgon. You can also craft them at a Gypsum Kiln using 40 Hive of the Gorgon Tokens.
Silken Cocoon and Dune Euplantula are powerful but unique items that only drop in the Trial of the Devourer. Keep in mind these are rare drops—so while farming, you can use the 725 Hoplite alternatives: Hoplite Shirt and Hoplite Boots.
Weapon
Hoplite lifestaff is best option. It has focus on it which allows to do better attribute split
Heceta artifact also good, but require other item be with your secondary attribute. Otherwise you will have to much magnify
Jewelry
Amulet and ring can only be obtained by crafting or buying from the Trading Post. There are no named alternatives for these two.
Armor Perks
Hold to main principles
x3-x4 enchanted ward (depends on boots you can find/craft/buy)
x4 refreshing
Upgrade gear with weapon perks
If there still some free perk slots upgrade it with health or mortal perks

Hoplite Mask
Light
Named
Gear Score
725
Attribute
36
MAG


Enchanted Ward
-4% damage from light and heavy attacks.

Refreshing
Reduce max cooldowns by 4%.

Nullifying Oblivion
When activated, Oblivion removes limited duration buffs from enemies within its radius and the cooldown is reduced by 10%.

Note : Use gems for protection based on mutation type Ruby - Fire, Aquamarine - Ice, Amethyst - Void, Amber - Nature

Hoplite Mask
Light
Named
Gear Score
725
Attribute
36
MAG


Enchanted Ward
-4% damage from light and heavy attacks.

Refreshing
Reduce max cooldowns by 4%.

Nullifying Oblivion
When activated, Oblivion removes limited duration buffs from enemies within its radius and the cooldown is reduced by 10%.

Note : Use gems for protection based on mutation type Ruby - Fire, Aquamarine - Ice, Amethyst - Void, Amber - Nature

Hoplite Mask
Light
Named
Gear Score
725
Attribute
36
MAG


Enchanted Ward
-4% damage from light and heavy attacks.

Refreshing
Reduce max cooldowns by 4%.

Nullifying Oblivion
When activated, Oblivion removes limited duration buffs from enemies within its radius and the cooldown is reduced by 10%.

Note : Use gems for protection based on mutation type Ruby - Fire, Aquamarine - Ice, Amethyst - Void, Amber - Nature
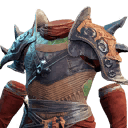
Silken Cocoon
Light
Named
Gear Score
725
Attribute
36
MAG


Shirking Energy
If a hit is avoided by dodging while in a light equip load, gain 16 Stamina (6s cooldown).

Keen
+7% critical chance.

Enchanted Ward
-4% damage from light and heavy attacks.

Note : Use gems for protection based on mutation type Ruby - Fire, Aquamarine - Ice, Amethyst - Void, Amber - Nature

Hoplite Shirt
Light
Named
Gear Score
725
Attribute
36
MAG


Enchanted Ward
-4% damage from light and heavy attacks.

Refreshing
Reduce max cooldowns by 4%.

Health
+2.4% max health.

Note : Use gems for protection based on mutation type Ruby - Fire, Aquamarine - Ice, Amethyst - Void, Amber - Nature

Silken Cocoon
Light
Named
Gear Score
725
Attribute
36
MAG


Shirking Energy
If a hit is avoided by dodging while in a light equip load, gain 16 Stamina (6s cooldown).

Keen
+7% critical chance.

Enchanted Ward
-4% damage from light and heavy attacks.

Note : Use gems for protection based on mutation type Ruby - Fire, Aquamarine - Ice, Amethyst - Void, Amber - Nature

Hoplite Shirt
Light
Named
Gear Score
725
Attribute
36
MAG


Enchanted Ward
-4% damage from light and heavy attacks.

Refreshing
Reduce max cooldowns by 4%.

Health
+2.4% max health.

Note : Use gems for protection based on mutation type Ruby - Fire, Aquamarine - Ice, Amethyst - Void, Amber - Nature

Silken Cocoon
Light
Named
Gear Score
725
Attribute
36
MAG


Shirking Energy
If a hit is avoided by dodging while in a light equip load, gain 16 Stamina (6s cooldown).

Keen
+7% critical chance.

Enchanted Ward
-4% damage from light and heavy attacks.

Note : Use gems for protection based on mutation type Ruby - Fire, Aquamarine - Ice, Amethyst - Void, Amber - Nature

Hoplite Shirt
Light
Named
Gear Score
725
Attribute
36
MAG


Enchanted Ward
-4% damage from light and heavy attacks.

Refreshing
Reduce max cooldowns by 4%.

Health
+2.4% max health.

Note : Use gems for protection based on mutation type Ruby - Fire, Aquamarine - Ice, Amethyst - Void, Amber - Nature

Silken Cocoon
Light
Named
Gear Score
725
Attribute
36
MAG


Shirking Energy
If a hit is avoided by dodging while in a light equip load, gain 16 Stamina (6s cooldown).

Keen
+7% critical chance.

Enchanted Ward
-4% damage from light and heavy attacks.

Note : Use gems for protection based on mutation type Ruby - Fire, Aquamarine - Ice, Amethyst - Void, Amber - Nature

Hoplite Shirt
Light
Named
Gear Score
725
Attribute
36
MAG


Enchanted Ward
-4% damage from light and heavy attacks.

Refreshing
Reduce max cooldowns by 4%.

Health
+2.4% max health.

Note : Use gems for protection based on mutation type Ruby - Fire, Aquamarine - Ice, Amethyst - Void, Amber - Nature

Silken Cocoon
Light
Named
Gear Score
725
Attribute
36
MAG


Shirking Energy
If a hit is avoided by dodging while in a light equip load, gain 16 Stamina (6s cooldown).

Keen
+7% critical chance.

Enchanted Ward
-4% damage from light and heavy attacks.

Note : Use gems for protection based on mutation type Ruby - Fire, Aquamarine - Ice, Amethyst - Void, Amber - Nature

Hoplite Shirt
Light
Named
Gear Score
725
Attribute
36
MAG


Enchanted Ward
-4% damage from light and heavy attacks.

Refreshing
Reduce max cooldowns by 4%.

Health
+2.4% max health.

Note : Use gems for protection based on mutation type Ruby - Fire, Aquamarine - Ice, Amethyst - Void, Amber - Nature

Silken Cocoon
Light
Named
Gear Score
725
Attribute
36
MAG


Shirking Energy
If a hit is avoided by dodging while in a light equip load, gain 16 Stamina (6s cooldown).

Keen
+7% critical chance.

Enchanted Ward
-4% damage from light and heavy attacks.

Note : Use gems for protection based on mutation type Ruby - Fire, Aquamarine - Ice, Amethyst - Void, Amber - Nature

Hoplite Shirt
Light
Named
Gear Score
725
Attribute
36
MAG


Enchanted Ward
-4% damage from light and heavy attacks.

Refreshing
Reduce max cooldowns by 4%.

Health
+2.4% max health.

Note : Use gems for protection based on mutation type Ruby - Fire, Aquamarine - Ice, Amethyst - Void, Amber - Nature

Silken Cocoon
Light
Named
Gear Score
725
Attribute
36
MAG


Shirking Energy
If a hit is avoided by dodging while in a light equip load, gain 16 Stamina (6s cooldown).

Keen
+7% critical chance.

Enchanted Ward
-4% damage from light and heavy attacks.

Note : Use gems for protection based on mutation type Ruby - Fire, Aquamarine - Ice, Amethyst - Void, Amber - Nature

Hoplite Shirt
Light
Named
Gear Score
725
Attribute
36
MAG


Enchanted Ward
-4% damage from light and heavy attacks.

Refreshing
Reduce max cooldowns by 4%.

Health
+2.4% max health.

Note : Use gems for protection based on mutation type Ruby - Fire, Aquamarine - Ice, Amethyst - Void, Amber - Nature

Silken Cocoon
Light
Named
Gear Score
725
Attribute
36
MAG


Shirking Energy
If a hit is avoided by dodging while in a light equip load, gain 16 Stamina (6s cooldown).

Keen
+7% critical chance.

Enchanted Ward
-4% damage from light and heavy attacks.

Note : Use gems for protection based on mutation type Ruby - Fire, Aquamarine - Ice, Amethyst - Void, Amber - Nature

Hoplite Shirt
Light
Named
Gear Score
725
Attribute
36
MAG


Enchanted Ward
-4% damage from light and heavy attacks.

Refreshing
Reduce max cooldowns by 4%.

Health
+2.4% max health.

Note : Use gems for protection based on mutation type Ruby - Fire, Aquamarine - Ice, Amethyst - Void, Amber - Nature
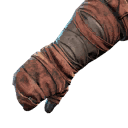
Hoplite Handcovers
Light
Named
Gear Score
725
Attribute
36
MAG


Enchanted Ward
-4% damage from light and heavy attacks.

Refreshing
Reduce max cooldowns by 4%.

Mending Protection
+27% outgoing healing power for 3s if Orb of Protection heals an ally below 50% Health.

Note : Use gems for protection based on mutation type Ruby - Fire, Aquamarine - Ice, Amethyst - Void, Amber - Nature

Hoplite Handcovers
Light
Named
Gear Score
725
Attribute
36
MAG


Enchanted Ward
-4% damage from light and heavy attacks.

Refreshing
Reduce max cooldowns by 4%.

Mending Protection
+27% outgoing healing power for 3s if Orb of Protection heals an ally below 50% Health.

Note : Use gems for protection based on mutation type Ruby - Fire, Aquamarine - Ice, Amethyst - Void, Amber - Nature

Hoplite Handcovers
Light
Named
Gear Score
725
Attribute
36
MAG


Enchanted Ward
-4% damage from light and heavy attacks.

Refreshing
Reduce max cooldowns by 4%.

Mending Protection
+27% outgoing healing power for 3s if Orb of Protection heals an ally below 50% Health.

Note : Use gems for protection based on mutation type Ruby - Fire, Aquamarine - Ice, Amethyst - Void, Amber - Nature

Attuned Leather Pants
Medium
Artifact
Gear Score
725
Attribute
45
MAG

Well Rounded
+11 to all attributes.


Refreshing
Reduce max cooldowns by 4%.

Elemental Aversion
Receive 4.5% less damage from ranged, elemental attacks.

Mortal Refreshment
Reduce all cooldowns by 8% on kill (1s cooldown).

Note : Use gems for protection based on mutation type Ruby - Fire, Aquamarine - Ice, Amethyst - Void, Amber - Nature

Attuned Leather Pants
Medium
Artifact
Gear Score
725
Attribute
45
MAG

Well Rounded
+11 to all attributes.


Refreshing
Reduce max cooldowns by 4%.

Elemental Aversion
Receive 4.5% less damage from ranged, elemental attacks.

Mortal Refreshment
Reduce all cooldowns by 8% on kill (1s cooldown).

Note : Use gems for protection based on mutation type Ruby - Fire, Aquamarine - Ice, Amethyst - Void, Amber - Nature

Attuned Leather Pants
Medium
Artifact
Gear Score
725
Attribute
45
MAG

Well Rounded
+11 to all attributes.


Refreshing
Reduce max cooldowns by 4%.

Elemental Aversion
Receive 4.5% less damage from ranged, elemental attacks.

Mortal Refreshment
Reduce all cooldowns by 8% on kill (1s cooldown).

Note : Use gems for protection based on mutation type Ruby - Fire, Aquamarine - Ice, Amethyst - Void, Amber - Nature

Dune Euplantula
Medium
Named
Gear Score
725
Attribute
36
MAG


Enchanted Ward
-4% damage from light and heavy attacks.

Elemental Aversion
Receive 4.5% less damage from ranged, elemental attacks.

Voracious Blade
While below 50% Health, heal for 34% of the damage dealt by Void Blade.

Note : Use gems for protection based on mutation type Ruby - Fire, Aquamarine - Ice, Amethyst - Void, Amber - Nature

Hoplite Boots
Medium
Named
Gear Score
725
Attribute
36
MAG


Hasted Vigor
Potency of incoming damage over time effects reduced by 7% per armor piece with this perk, and taking a hit whle inflicted with a DoT will grant 10% haste for 5s.

Refreshing
Reduce max cooldowns by 4%.

Voracious Blade
While below 50% Health, heal for 34% of the damage dealt by Void Blade.

Note : Use gems for protection based on mutation type Ruby - Fire, Aquamarine - Ice, Amethyst - Void, Amber - Nature

Dune Euplantula
Medium
Named
Gear Score
725
Attribute
36
MAG


Enchanted Ward
-4% damage from light and heavy attacks.

Elemental Aversion
Receive 4.5% less damage from ranged, elemental attacks.

Voracious Blade
While below 50% Health, heal for 34% of the damage dealt by Void Blade.

Note : Use gems for protection based on mutation type Ruby - Fire, Aquamarine - Ice, Amethyst - Void, Amber - Nature

Hoplite Boots
Medium
Named
Gear Score
725
Attribute
36
MAG


Hasted Vigor
Potency of incoming damage over time effects reduced by 7% per armor piece with this perk, and taking a hit whle inflicted with a DoT will grant 10% haste for 5s.

Refreshing
Reduce max cooldowns by 4%.

Voracious Blade
While below 50% Health, heal for 34% of the damage dealt by Void Blade.

Note : Use gems for protection based on mutation type Ruby - Fire, Aquamarine - Ice, Amethyst - Void, Amber - Nature

Dune Euplantula
Medium
Named
Gear Score
725
Attribute
36
MAG


Enchanted Ward
-4% damage from light and heavy attacks.

Elemental Aversion
Receive 4.5% less damage from ranged, elemental attacks.

Voracious Blade
While below 50% Health, heal for 34% of the damage dealt by Void Blade.

Note : Use gems for protection based on mutation type Ruby - Fire, Aquamarine - Ice, Amethyst - Void, Amber - Nature

Hoplite Boots
Medium
Named
Gear Score
725
Attribute
36
MAG


Hasted Vigor
Potency of incoming damage over time effects reduced by 7% per armor piece with this perk, and taking a hit whle inflicted with a DoT will grant 10% haste for 5s.

Refreshing
Reduce max cooldowns by 4%.

Voracious Blade
While below 50% Health, heal for 34% of the damage dealt by Void Blade.

Note : Use gems for protection based on mutation type Ruby - Fire, Aquamarine - Ice, Amethyst - Void, Amber - Nature

Dune Euplantula
Medium
Named
Gear Score
725
Attribute
36
MAG


Enchanted Ward
-4% damage from light and heavy attacks.

Elemental Aversion
Receive 4.5% less damage from ranged, elemental attacks.

Voracious Blade
While below 50% Health, heal for 34% of the damage dealt by Void Blade.

Note : Use gems for protection based on mutation type Ruby - Fire, Aquamarine - Ice, Amethyst - Void, Amber - Nature

Hoplite Boots
Medium
Named
Gear Score
725
Attribute
36
MAG


Hasted Vigor
Potency of incoming damage over time effects reduced by 7% per armor piece with this perk, and taking a hit whle inflicted with a DoT will grant 10% haste for 5s.

Refreshing
Reduce max cooldowns by 4%.

Voracious Blade
While below 50% Health, heal for 34% of the damage dealt by Void Blade.

Note : Use gems for protection based on mutation type Ruby - Fire, Aquamarine - Ice, Amethyst - Void, Amber - Nature

Dune Euplantula
Medium
Named
Gear Score
725
Attribute
36
MAG


Enchanted Ward
-4% damage from light and heavy attacks.

Elemental Aversion
Receive 4.5% less damage from ranged, elemental attacks.

Voracious Blade
While below 50% Health, heal for 34% of the damage dealt by Void Blade.

Note : Use gems for protection based on mutation type Ruby - Fire, Aquamarine - Ice, Amethyst - Void, Amber - Nature

Hoplite Boots
Medium
Named
Gear Score
725
Attribute
36
MAG


Hasted Vigor
Potency of incoming damage over time effects reduced by 7% per armor piece with this perk, and taking a hit whle inflicted with a DoT will grant 10% haste for 5s.

Refreshing
Reduce max cooldowns by 4%.

Voracious Blade
While below 50% Health, heal for 34% of the damage dealt by Void Blade.

Note : Use gems for protection based on mutation type Ruby - Fire, Aquamarine - Ice, Amethyst - Void, Amber - Nature

Dune Euplantula
Medium
Named
Gear Score
725
Attribute
36
MAG


Enchanted Ward
-4% damage from light and heavy attacks.

Elemental Aversion
Receive 4.5% less damage from ranged, elemental attacks.

Voracious Blade
While below 50% Health, heal for 34% of the damage dealt by Void Blade.

Note : Use gems for protection based on mutation type Ruby - Fire, Aquamarine - Ice, Amethyst - Void, Amber - Nature

Hoplite Boots
Medium
Named
Gear Score
725
Attribute
36
MAG


Hasted Vigor
Potency of incoming damage over time effects reduced by 7% per armor piece with this perk, and taking a hit whle inflicted with a DoT will grant 10% haste for 5s.

Refreshing
Reduce max cooldowns by 4%.

Voracious Blade
While below 50% Health, heal for 34% of the damage dealt by Void Blade.

Note : Use gems for protection based on mutation type Ruby - Fire, Aquamarine - Ice, Amethyst - Void, Amber - Nature

Dune Euplantula
Medium
Named
Gear Score
725
Attribute
36
MAG


Enchanted Ward
-4% damage from light and heavy attacks.

Elemental Aversion
Receive 4.5% less damage from ranged, elemental attacks.

Voracious Blade
While below 50% Health, heal for 34% of the damage dealt by Void Blade.

Note : Use gems for protection based on mutation type Ruby - Fire, Aquamarine - Ice, Amethyst - Void, Amber - Nature

Hoplite Boots
Medium
Named
Gear Score
725
Attribute
36
MAG


Hasted Vigor
Potency of incoming damage over time effects reduced by 7% per armor piece with this perk, and taking a hit whle inflicted with a DoT will grant 10% haste for 5s.

Refreshing
Reduce max cooldowns by 4%.

Voracious Blade
While below 50% Health, heal for 34% of the damage dealt by Void Blade.

Note : Use gems for protection based on mutation type Ruby - Fire, Aquamarine - Ice, Amethyst - Void, Amber - Nature

Dune Euplantula
Medium
Named
Gear Score
725
Attribute
36
MAG


Enchanted Ward
-4% damage from light and heavy attacks.

Elemental Aversion
Receive 4.5% less damage from ranged, elemental attacks.

Voracious Blade
While below 50% Health, heal for 34% of the damage dealt by Void Blade.

Note : Use gems for protection based on mutation type Ruby - Fire, Aquamarine - Ice, Amethyst - Void, Amber - Nature

Hoplite Boots
Medium
Named
Gear Score
725
Attribute
36
MAG


Hasted Vigor
Potency of incoming damage over time effects reduced by 7% per armor piece with this perk, and taking a hit whle inflicted with a DoT will grant 10% haste for 5s.

Refreshing
Reduce max cooldowns by 4%.

Voracious Blade
While below 50% Health, heal for 34% of the damage dealt by Void Blade.

Note : Use gems for protection based on mutation type Ruby - Fire, Aquamarine - Ice, Amethyst - Void, Amber - Nature

Hoplite Life Staff
Named
Gear Score
725
Attribute
42
FOC


Blessed
+12% outgoing healing efficiency.

Fortifying Sacred Ground
Allies healed by Sacred Ground gain Fortify, increasing armor by 17% for 5s.

Refreshing Move
Light and Heavy attacks reduce your active weapon cooldowns by 2.5% (0.2s cooldown).


No Runeglass
Cut Pristine Diamond

Hoplite Life Staff
Named
Gear Score
725
Attribute
42
FOC


Blessed
+12% outgoing healing efficiency.

Fortifying Sacred Ground
Allies healed by Sacred Ground gain Fortify, increasing armor by 17% for 5s.

Refreshing Move
Light and Heavy attacks reduce your active weapon cooldowns by 2.5% (0.2s cooldown).


No Runeglass
Cut Pristine Diamond

Hoplite Life Staff
Named
Gear Score
725
Attribute
42
FOC


Blessed
+12% outgoing healing efficiency.

Fortifying Sacred Ground
Allies healed by Sacred Ground gain Fortify, increasing armor by 17% for 5s.

Refreshing Move
Light and Heavy attacks reduce your active weapon cooldowns by 2.5% (0.2s cooldown).


No Runeglass
Cut Pristine Diamond

Gorgonite Void Gauntlert
Crafted
Gear Score
725
Attribute
42
MAG


Distained Infliction
Potency of outgoing DoTs are increased by 15%. Hitting a target inflicted by your DoTs will extend the duration of them by 5% (1s Cooldown.) PvE Only: Deal +5% base damage against hostile AI inflicted with DoTs.

Sundering Stacks
Attack inflicts a stack of 4% Rend, each stack lasting 6s. (Max 5 stacks)

Putrefying Scream
Petrifying Scream inflicts Disease on hit, reducing the target's incoming healing by 43% and outgoing healing by 21% for 8s.


No Runeglass
Cut Pristine Diamond

Gorgonite Void Gauntlert
Crafted
Gear Score
725
Attribute
42
MAG


Distained Infliction
Potency of outgoing DoTs are increased by 15%. Hitting a target inflicted by your DoTs will extend the duration of them by 5% (1s Cooldown.) PvE Only: Deal +5% base damage against hostile AI inflicted with DoTs.

Sundering Stacks
Attack inflicts a stack of 4% Rend, each stack lasting 6s. (Max 5 stacks)

Putrefying Scream
Petrifying Scream inflicts Disease on hit, reducing the target's incoming healing by 43% and outgoing healing by 21% for 8s.


No Runeglass
Cut Pristine Diamond

Gorgonite Void Gauntlert
Crafted
Gear Score
725
Attribute
42
MAG


Distained Infliction
Potency of outgoing DoTs are increased by 15%. Hitting a target inflicted by your DoTs will extend the duration of them by 5% (1s Cooldown.) PvE Only: Deal +5% base damage against hostile AI inflicted with DoTs.

Sundering Stacks
Attack inflicts a stack of 4% Rend, each stack lasting 6s. (Max 5 stacks)

Putrefying Scream
Petrifying Scream inflicts Disease on hit, reducing the target's incoming healing by 43% and outgoing healing by 21% for 8s.


No Runeglass
Cut Pristine Diamond
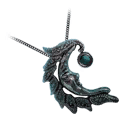
Gorgon's Amulet
Light
Crafted
Gear Score
725
Attribute
36
MAG


Health
+7% max Health.

Empowered
Empower you apply lasts 34% longer.

Nature Protection
Receive 15% less Nature damage.

Note : Use gems for protection based on mutation type Ruby - Fire, Aquamarine - Ice, Amethyst - Void, Amber - Nature

Gorgon's Amulet
Light
Crafted
Gear Score
725
Attribute
36
MAG


Health
+7% max Health.

Empowered
Empower you apply lasts 34% longer.

Flame Protection
Receive 15% less Fire damage.

Note : Use gems for protection based on mutation type Ruby - Fire, Aquamarine - Ice, Amethyst - Void, Amber - Nature

Gorgon's Amulet
Light
Crafted
Gear Score
725
Attribute
36
MAG


Health
+7% max Health.

Empowered
Empower you apply lasts 34% longer.

Frozen Protection
Receive 15% less Ice damage.

Note : Use gems for protection based on mutation type Ruby - Fire, Aquamarine - Ice, Amethyst - Void, Amber - Nature

Gorgon's Amulet
Light
Crafted
Gear Score
725
Attribute
36
MAG


Health
+7% max Health.

Empowered
Empower you apply lasts 34% longer.

Void Protection
Receive 15% less Void damage.

Note : Use gems for protection based on mutation type Ruby - Fire, Aquamarine - Ice, Amethyst - Void, Amber - Nature

Gorgon's Amulet
Light
Crafted
Gear Score
725
Attribute
36
MAG


Health
+7% max Health.

Empowered
Empower you apply lasts 34% longer.

Strike Protection
Receive 15% less Strike damage.

Note : Use gems for protection based on mutation type Ruby - Fire, Aquamarine - Ice, Amethyst - Void, Amber - Nature

Gorgon's Amulet
Light
Crafted
Gear Score
725
Attribute
36
MAG


Health
+7% max Health.

Empowered
Empower you apply lasts 34% longer.

Slash Protection
Receive 15% less Slash damage.

Note : Use gems for protection based on mutation type Ruby - Fire, Aquamarine - Ice, Amethyst - Void, Amber - Nature

Gorgon's Amulet
Light
Crafted
Gear Score
725
Attribute
36
MAG


Health
+7% max Health.

Empowered
Empower you apply lasts 34% longer.

Thrust Protection
Receive 15% less Thrust damage.

Note : Use gems for protection based on mutation type Ruby - Fire, Aquamarine - Ice, Amethyst - Void, Amber - Nature

Gorgon's Amulet
Light
Crafted
Gear Score
725
Attribute
36
MAG


Health
+7% max Health.

Empowered
Empower you apply lasts 34% longer.

Nature Protection
Receive 15% less Nature damage.

Note : Use gems for protection based on mutation type Ruby - Fire, Aquamarine - Ice, Amethyst - Void, Amber - Nature

Gorgon's Amulet
Light
Crafted
Gear Score
725
Attribute
36
MAG


Health
+7% max Health.

Empowered
Empower you apply lasts 34% longer.

Flame Protection
Receive 15% less Fire damage.

Note : Use gems for protection based on mutation type Ruby - Fire, Aquamarine - Ice, Amethyst - Void, Amber - Nature

Gorgon's Amulet
Light
Crafted
Gear Score
725
Attribute
36
MAG


Health
+7% max Health.

Empowered
Empower you apply lasts 34% longer.

Frozen Protection
Receive 15% less Ice damage.

Note : Use gems for protection based on mutation type Ruby - Fire, Aquamarine - Ice, Amethyst - Void, Amber - Nature

Gorgon's Amulet
Light
Crafted
Gear Score
725
Attribute
36
MAG


Health
+7% max Health.

Empowered
Empower you apply lasts 34% longer.

Void Protection
Receive 15% less Void damage.

Note : Use gems for protection based on mutation type Ruby - Fire, Aquamarine - Ice, Amethyst - Void, Amber - Nature

Gorgon's Amulet
Light
Crafted
Gear Score
725
Attribute
36
MAG


Health
+7% max Health.

Empowered
Empower you apply lasts 34% longer.

Strike Protection
Receive 15% less Strike damage.

Note : Use gems for protection based on mutation type Ruby - Fire, Aquamarine - Ice, Amethyst - Void, Amber - Nature

Gorgon's Amulet
Light
Crafted
Gear Score
725
Attribute
36
MAG


Health
+7% max Health.

Empowered
Empower you apply lasts 34% longer.

Slash Protection
Receive 15% less Slash damage.

Note : Use gems for protection based on mutation type Ruby - Fire, Aquamarine - Ice, Amethyst - Void, Amber - Nature

Gorgon's Amulet
Light
Crafted
Gear Score
725
Attribute
36
MAG


Health
+7% max Health.

Empowered
Empower you apply lasts 34% longer.

Thrust Protection
Receive 15% less Thrust damage.

Note : Use gems for protection based on mutation type Ruby - Fire, Aquamarine - Ice, Amethyst - Void, Amber - Nature

Gorgon's Amulet
Light
Crafted
Gear Score
725
Attribute
36
MAG


Health
+7% max Health.

Empowered
Empower you apply lasts 34% longer.

Nature Protection
Receive 15% less Nature damage.

Note : Use gems for protection based on mutation type Ruby - Fire, Aquamarine - Ice, Amethyst - Void, Amber - Nature

Gorgon's Amulet
Light
Crafted
Gear Score
725
Attribute
36
MAG


Health
+7% max Health.

Empowered
Empower you apply lasts 34% longer.

Flame Protection
Receive 15% less Fire damage.

Note : Use gems for protection based on mutation type Ruby - Fire, Aquamarine - Ice, Amethyst - Void, Amber - Nature

Gorgon's Amulet
Light
Crafted
Gear Score
725
Attribute
36
MAG


Health
+7% max Health.

Empowered
Empower you apply lasts 34% longer.

Frozen Protection
Receive 15% less Ice damage.

Note : Use gems for protection based on mutation type Ruby - Fire, Aquamarine - Ice, Amethyst - Void, Amber - Nature

Gorgon's Amulet
Light
Crafted
Gear Score
725
Attribute
36
MAG


Health
+7% max Health.

Empowered
Empower you apply lasts 34% longer.

Void Protection
Receive 15% less Void damage.

Note : Use gems for protection based on mutation type Ruby - Fire, Aquamarine - Ice, Amethyst - Void, Amber - Nature

Gorgon's Amulet
Light
Crafted
Gear Score
725
Attribute
36
MAG


Health
+7% max Health.

Empowered
Empower you apply lasts 34% longer.

Strike Protection
Receive 15% less Strike damage.

Note : Use gems for protection based on mutation type Ruby - Fire, Aquamarine - Ice, Amethyst - Void, Amber - Nature

Gorgon's Amulet
Light
Crafted
Gear Score
725
Attribute
36
MAG


Health
+7% max Health.

Empowered
Empower you apply lasts 34% longer.

Slash Protection
Receive 15% less Slash damage.

Note : Use gems for protection based on mutation type Ruby - Fire, Aquamarine - Ice, Amethyst - Void, Amber - Nature

Gorgon's Amulet
Light
Crafted
Gear Score
725
Attribute
36
MAG


Health
+7% max Health.

Empowered
Empower you apply lasts 34% longer.

Thrust Protection
Receive 15% less Thrust damage.

Note : Use gems for protection based on mutation type Ruby - Fire, Aquamarine - Ice, Amethyst - Void, Amber - Nature

Gorgon's Amulet
Light
Crafted
Gear Score
725
Attribute
36
MAG


Health
+7% max Health.

Empowered
Empower you apply lasts 34% longer.

Nature Protection
Receive 15% less Nature damage.

Note : Use gems for protection based on mutation type Ruby - Fire, Aquamarine - Ice, Amethyst - Void, Amber - Nature

Gorgon's Amulet
Light
Crafted
Gear Score
725
Attribute
36
MAG


Health
+7% max Health.

Empowered
Empower you apply lasts 34% longer.

Flame Protection
Receive 15% less Fire damage.

Note : Use gems for protection based on mutation type Ruby - Fire, Aquamarine - Ice, Amethyst - Void, Amber - Nature

Gorgon's Amulet
Light
Crafted
Gear Score
725
Attribute
36
MAG


Health
+7% max Health.

Empowered
Empower you apply lasts 34% longer.

Frozen Protection
Receive 15% less Ice damage.

Note : Use gems for protection based on mutation type Ruby - Fire, Aquamarine - Ice, Amethyst - Void, Amber - Nature

Gorgon's Amulet
Light
Crafted
Gear Score
725
Attribute
36
MAG


Health
+7% max Health.

Empowered
Empower you apply lasts 34% longer.

Void Protection
Receive 15% less Void damage.

Note : Use gems for protection based on mutation type Ruby - Fire, Aquamarine - Ice, Amethyst - Void, Amber - Nature

Gorgon's Amulet
Light
Crafted
Gear Score
725
Attribute
36
MAG


Health
+7% max Health.

Empowered
Empower you apply lasts 34% longer.

Strike Protection
Receive 15% less Strike damage.

Note : Use gems for protection based on mutation type Ruby - Fire, Aquamarine - Ice, Amethyst - Void, Amber - Nature

Gorgon's Amulet
Light
Crafted
Gear Score
725
Attribute
36
MAG


Health
+7% max Health.

Empowered
Empower you apply lasts 34% longer.

Slash Protection
Receive 15% less Slash damage.

Note : Use gems for protection based on mutation type Ruby - Fire, Aquamarine - Ice, Amethyst - Void, Amber - Nature

Gorgon's Amulet
Light
Crafted
Gear Score
725
Attribute
36
MAG


Health
+7% max Health.

Empowered
Empower you apply lasts 34% longer.

Thrust Protection
Receive 15% less Thrust damage.

Note : Use gems for protection based on mutation type Ruby - Fire, Aquamarine - Ice, Amethyst - Void, Amber - Nature

Gorgon's Amulet
Light
Crafted
Gear Score
725
Attribute
36
MAG


Health
+7% max Health.

Empowered
Empower you apply lasts 34% longer.

Nature Protection
Receive 15% less Nature damage.

Note : Use gems for protection based on mutation type Ruby - Fire, Aquamarine - Ice, Amethyst - Void, Amber - Nature

Gorgon's Amulet
Light
Crafted
Gear Score
725
Attribute
36
MAG


Health
+7% max Health.

Empowered
Empower you apply lasts 34% longer.

Flame Protection
Receive 15% less Fire damage.

Note : Use gems for protection based on mutation type Ruby - Fire, Aquamarine - Ice, Amethyst - Void, Amber - Nature

Gorgon's Amulet
Light
Crafted
Gear Score
725
Attribute
36
MAG


Health
+7% max Health.

Empowered
Empower you apply lasts 34% longer.

Frozen Protection
Receive 15% less Ice damage.

Note : Use gems for protection based on mutation type Ruby - Fire, Aquamarine - Ice, Amethyst - Void, Amber - Nature

Gorgon's Amulet
Light
Crafted
Gear Score
725
Attribute
36
MAG


Health
+7% max Health.

Empowered
Empower you apply lasts 34% longer.

Void Protection
Receive 15% less Void damage.

Note : Use gems for protection based on mutation type Ruby - Fire, Aquamarine - Ice, Amethyst - Void, Amber - Nature

Gorgon's Amulet
Light
Crafted
Gear Score
725
Attribute
36
MAG


Health
+7% max Health.

Empowered
Empower you apply lasts 34% longer.

Strike Protection
Receive 15% less Strike damage.

Note : Use gems for protection based on mutation type Ruby - Fire, Aquamarine - Ice, Amethyst - Void, Amber - Nature

Gorgon's Amulet
Light
Crafted
Gear Score
725
Attribute
36
MAG


Health
+7% max Health.

Empowered
Empower you apply lasts 34% longer.

Slash Protection
Receive 15% less Slash damage.

Note : Use gems for protection based on mutation type Ruby - Fire, Aquamarine - Ice, Amethyst - Void, Amber - Nature

Gorgon's Amulet
Light
Crafted
Gear Score
725
Attribute
36
MAG


Health
+7% max Health.

Empowered
Empower you apply lasts 34% longer.

Thrust Protection
Receive 15% less Thrust damage.

Note : Use gems for protection based on mutation type Ruby - Fire, Aquamarine - Ice, Amethyst - Void, Amber - Nature

Gorgon's Amulet
Light
Crafted
Gear Score
725
Attribute
36
MAG


Health
+7% max Health.

Empowered
Empower you apply lasts 34% longer.

Nature Protection
Receive 15% less Nature damage.

Note : Use gems for protection based on mutation type Ruby - Fire, Aquamarine - Ice, Amethyst - Void, Amber - Nature

Gorgon's Amulet
Light
Crafted
Gear Score
725
Attribute
36
MAG


Health
+7% max Health.

Empowered
Empower you apply lasts 34% longer.

Flame Protection
Receive 15% less Fire damage.

Note : Use gems for protection based on mutation type Ruby - Fire, Aquamarine - Ice, Amethyst - Void, Amber - Nature

Gorgon's Amulet
Light
Crafted
Gear Score
725
Attribute
36
MAG


Health
+7% max Health.

Empowered
Empower you apply lasts 34% longer.

Frozen Protection
Receive 15% less Ice damage.

Note : Use gems for protection based on mutation type Ruby - Fire, Aquamarine - Ice, Amethyst - Void, Amber - Nature

Gorgon's Amulet
Light
Crafted
Gear Score
725
Attribute
36
MAG


Health
+7% max Health.

Empowered
Empower you apply lasts 34% longer.

Void Protection
Receive 15% less Void damage.

Note : Use gems for protection based on mutation type Ruby - Fire, Aquamarine - Ice, Amethyst - Void, Amber - Nature

Gorgon's Amulet
Light
Crafted
Gear Score
725
Attribute
36
MAG


Health
+7% max Health.

Empowered
Empower you apply lasts 34% longer.

Strike Protection
Receive 15% less Strike damage.

Note : Use gems for protection based on mutation type Ruby - Fire, Aquamarine - Ice, Amethyst - Void, Amber - Nature

Gorgon's Amulet
Light
Crafted
Gear Score
725
Attribute
36
MAG


Health
+7% max Health.

Empowered
Empower you apply lasts 34% longer.

Slash Protection
Receive 15% less Slash damage.

Note : Use gems for protection based on mutation type Ruby - Fire, Aquamarine - Ice, Amethyst - Void, Amber - Nature

Gorgon's Amulet
Light
Crafted
Gear Score
725
Attribute
36
MAG


Health
+7% max Health.

Empowered
Empower you apply lasts 34% longer.

Thrust Protection
Receive 15% less Thrust damage.

Note : Use gems for protection based on mutation type Ruby - Fire, Aquamarine - Ice, Amethyst - Void, Amber - Nature

Gorgon's Amulet
Light
Crafted
Gear Score
725
Attribute
36
MAG


Health
+7% max Health.

Empowered
Empower you apply lasts 34% longer.

Nature Protection
Receive 15% less Nature damage.

Note : Use gems for protection based on mutation type Ruby - Fire, Aquamarine - Ice, Amethyst - Void, Amber - Nature

Gorgon's Amulet
Light
Crafted
Gear Score
725
Attribute
36
MAG


Health
+7% max Health.

Empowered
Empower you apply lasts 34% longer.

Flame Protection
Receive 15% less Fire damage.

Note : Use gems for protection based on mutation type Ruby - Fire, Aquamarine - Ice, Amethyst - Void, Amber - Nature

Gorgon's Amulet
Light
Crafted
Gear Score
725
Attribute
36
MAG


Health
+7% max Health.

Empowered
Empower you apply lasts 34% longer.

Frozen Protection
Receive 15% less Ice damage.

Note : Use gems for protection based on mutation type Ruby - Fire, Aquamarine - Ice, Amethyst - Void, Amber - Nature

Gorgon's Amulet
Light
Crafted
Gear Score
725
Attribute
36
MAG


Health
+7% max Health.

Empowered
Empower you apply lasts 34% longer.

Void Protection
Receive 15% less Void damage.

Note : Use gems for protection based on mutation type Ruby - Fire, Aquamarine - Ice, Amethyst - Void, Amber - Nature

Gorgon's Amulet
Light
Crafted
Gear Score
725
Attribute
36
MAG


Health
+7% max Health.

Empowered
Empower you apply lasts 34% longer.

Strike Protection
Receive 15% less Strike damage.

Note : Use gems for protection based on mutation type Ruby - Fire, Aquamarine - Ice, Amethyst - Void, Amber - Nature

Gorgon's Amulet
Light
Crafted
Gear Score
725
Attribute
36
MAG


Health
+7% max Health.

Empowered
Empower you apply lasts 34% longer.

Slash Protection
Receive 15% less Slash damage.

Note : Use gems for protection based on mutation type Ruby - Fire, Aquamarine - Ice, Amethyst - Void, Amber - Nature

Gorgon's Amulet
Light
Crafted
Gear Score
725
Attribute
36
MAG


Health
+7% max Health.

Empowered
Empower you apply lasts 34% longer.

Thrust Protection
Receive 15% less Thrust damage.

Note : Use gems for protection based on mutation type Ruby - Fire, Aquamarine - Ice, Amethyst - Void, Amber - Nature

Gorgon's Amulet
Light
Crafted
Gear Score
725
Attribute
36
MAG


Health
+7% max Health.

Empowered
Empower you apply lasts 34% longer.

Nature Protection
Receive 15% less Nature damage.

Note : Use gems for protection based on mutation type Ruby - Fire, Aquamarine - Ice, Amethyst - Void, Amber - Nature

Gorgon's Amulet
Light
Crafted
Gear Score
725
Attribute
36
MAG


Health
+7% max Health.

Empowered
Empower you apply lasts 34% longer.

Flame Protection
Receive 15% less Fire damage.

Note : Use gems for protection based on mutation type Ruby - Fire, Aquamarine - Ice, Amethyst - Void, Amber - Nature

Gorgon's Amulet
Light
Crafted
Gear Score
725
Attribute
36
MAG


Health
+7% max Health.

Empowered
Empower you apply lasts 34% longer.

Frozen Protection
Receive 15% less Ice damage.

Note : Use gems for protection based on mutation type Ruby - Fire, Aquamarine - Ice, Amethyst - Void, Amber - Nature

Gorgon's Amulet
Light
Crafted
Gear Score
725
Attribute
36
MAG


Health
+7% max Health.

Empowered
Empower you apply lasts 34% longer.

Void Protection
Receive 15% less Void damage.

Note : Use gems for protection based on mutation type Ruby - Fire, Aquamarine - Ice, Amethyst - Void, Amber - Nature

Gorgon's Amulet
Light
Crafted
Gear Score
725
Attribute
36
MAG


Health
+7% max Health.

Empowered
Empower you apply lasts 34% longer.

Strike Protection
Receive 15% less Strike damage.

Note : Use gems for protection based on mutation type Ruby - Fire, Aquamarine - Ice, Amethyst - Void, Amber - Nature

Gorgon's Amulet
Light
Crafted
Gear Score
725
Attribute
36
MAG


Health
+7% max Health.

Empowered
Empower you apply lasts 34% longer.

Slash Protection
Receive 15% less Slash damage.

Note : Use gems for protection based on mutation type Ruby - Fire, Aquamarine - Ice, Amethyst - Void, Amber - Nature

Gorgon's Amulet
Light
Crafted
Gear Score
725
Attribute
36
MAG


Health
+7% max Health.

Empowered
Empower you apply lasts 34% longer.

Thrust Protection
Receive 15% less Thrust damage.

Note : Use gems for protection based on mutation type Ruby - Fire, Aquamarine - Ice, Amethyst - Void, Amber - Nature

Gorgon's Ring
Light
Crafted
Gear Score
725
Attribute
36
MAG


Hearty
+10% max Stamina.

Keen Awareness
+7% critical chance.

sacred
+9.5% outgoing healing efficiency.

Note : Use gems for protection based on mutation type Ruby - Fire, Aquamarine - Ice, Amethyst - Void, Amber - Nature

Gorgon's Ring
Light
Crafted
Gear Score
725
Attribute
36
MAG


Hearty
+10% max Stamina.

Keen Awareness
+7% critical chance.

sacred
+9.5% outgoing healing efficiency.

Note : Use gems for protection based on mutation type Ruby - Fire, Aquamarine - Ice, Amethyst - Void, Amber - Nature

Gorgon's Ring
Light
Crafted
Gear Score
725
Attribute
36
MAG


Hearty
+10% max Stamina.

Keen Awareness
+7% critical chance.

sacred
+9.5% outgoing healing efficiency.

Note : Use gems for protection based on mutation type Ruby - Fire, Aquamarine - Ice, Amethyst - Void, Amber - Nature
Hoplite Earring
Light
Named
Gear Score
725
Attribute
36
MAG


Refreshing Toast
Potions cooldown 10% faster.

Refreshing
Reduce max cooldowns by 4%.
Empowering Toast
On Potion Drink: Gain 10% Empower for 8s (10s cooldown).

Note : Use gems for protection based on mutation type Ruby - Fire, Aquamarine - Ice, Amethyst - Void, Amber - Nature

Hoplite Earring
Light
Named
Gear Score
725
Attribute
36
MAG


Refreshing Toast
Potions cooldown 10% faster.

Refreshing
Reduce max cooldowns by 4%.
Empowering Toast
On Potion Drink: Gain 10% Empower for 8s (10s cooldown).

Note : Use gems for protection based on mutation type Ruby - Fire, Aquamarine - Ice, Amethyst - Void, Amber - Nature

Hoplite Earring
Light
Named
Gear Score
725
Attribute
36
MAG


Refreshing Toast
Potions cooldown 10% faster.

Refreshing
Reduce max cooldowns by 4%.
Empowering Toast
On Potion Drink: Gain 10% Empower for 8s (10s cooldown).

Note : Use gems for protection based on mutation type Ruby - Fire, Aquamarine - Ice, Amethyst - Void, Amber - Nature
Final Touch
This final variation require PVP track grind to get Old Crown so before you got it run the Attuned Leather Pants. Make sure to get refreshing on your earring to keep it x4. Hoplite Earring is your best option. You will also need to inductor craft sandals and pants or get it from the market

Old Crown
Medium
Artifact
Gear Score
725
Attribute
36
MAG

Royal
+11 to all attributes.


Immaculate Onyx
+3% Physical Damage Absorption.

Immaculate Opal
+3% Elemental Damage Absorption.

Enchanted Ward
-4% damage from light and heavy attacks.

Note : Use gems for protection based on mutation type Ruby - Fire, Aquamarine - Ice, Amethyst - Void, Amber - Nature

Old Crown
Medium
Artifact
Gear Score
725
Attribute
36
MAG

Royal
+11 to all attributes.


Immaculate Onyx
+3% Physical Damage Absorption.

Immaculate Opal
+3% Elemental Damage Absorption.

Enchanted Ward
-4% damage from light and heavy attacks.

Note : Use gems for protection based on mutation type Ruby - Fire, Aquamarine - Ice, Amethyst - Void, Amber - Nature

Old Crown
Medium
Artifact
Gear Score
725
Attribute
36
MAG

Royal
+11 to all attributes.


Immaculate Onyx
+3% Physical Damage Absorption.

Immaculate Opal
+3% Elemental Damage Absorption.

Enchanted Ward
-4% damage from light and heavy attacks.

Note : Use gems for protection based on mutation type Ruby - Fire, Aquamarine - Ice, Amethyst - Void, Amber - Nature

Silken Cocoon
Light
Named
Gear Score
725
Attribute
36
MAG


Shirking Energy
If a hit is avoided by dodging while in a light equip load, gain 16 Stamina (6s cooldown).

Keen
+7% critical chance.

Enchanted Ward
-4% damage from light and heavy attacks.

Note : Use gems for protection based on mutation type Ruby - Fire, Aquamarine - Ice, Amethyst - Void, Amber - Nature

Silken Cocoon
Light
Named
Gear Score
725
Attribute
36
MAG


Shirking Energy
If a hit is avoided by dodging while in a light equip load, gain 16 Stamina (6s cooldown).

Keen
+7% critical chance.

Enchanted Ward
-4% damage from light and heavy attacks.

Note : Use gems for protection based on mutation type Ruby - Fire, Aquamarine - Ice, Amethyst - Void, Amber - Nature

Silken Cocoon
Light
Named
Gear Score
725
Attribute
36
MAG


Shirking Energy
If a hit is avoided by dodging while in a light equip load, gain 16 Stamina (6s cooldown).

Keen
+7% critical chance.

Enchanted Ward
-4% damage from light and heavy attacks.

Note : Use gems for protection based on mutation type Ruby - Fire, Aquamarine - Ice, Amethyst - Void, Amber - Nature

Hoplite Handcovers
Light
Named
Gear Score
725
Attribute
36
MAG


Enchanted Ward
-4% damage from light and heavy attacks.

Refreshing
Reduce max cooldowns by 4%.

Mending Protection
+27% outgoing healing power for 3s if Orb of Protection heals an ally below 50% Health.

Note : Use gems for protection based on mutation type Ruby - Fire, Aquamarine - Ice, Amethyst - Void, Amber - Nature

Hoplite Handcovers
Light
Named
Gear Score
725
Attribute
36
MAG


Enchanted Ward
-4% damage from light and heavy attacks.

Refreshing
Reduce max cooldowns by 4%.

Mending Protection
+27% outgoing healing power for 3s if Orb of Protection heals an ally below 50% Health.

Note : Use gems for protection based on mutation type Ruby - Fire, Aquamarine - Ice, Amethyst - Void, Amber - Nature

Hoplite Handcovers
Light
Named
Gear Score
725
Attribute
36
MAG


Enchanted Ward
-4% damage from light and heavy attacks.

Refreshing
Reduce max cooldowns by 4%.

Mending Protection
+27% outgoing healing power for 3s if Orb of Protection heals an ally below 50% Health.

Note : Use gems for protection based on mutation type Ruby - Fire, Aquamarine - Ice, Amethyst - Void, Amber - Nature

Gorgonite Pants
Medium
Crafted
Gear Score
725
Attribute
36
FOC


Enchanted Ward
-4% damage from light and heavy attacks.

Nullifying Oblivion
When activated, Oblivion removes limited duration buffs from enemies within its radius and the cooldown is reduced by 10%.

Refreshing
Reduce max cooldowns by 4%.

Note : Use gems for protection based on mutation type Ruby - Fire, Aquamarine - Ice, Amethyst - Void, Amber - Nature

Gorgonite Pants
Medium
Crafted
Gear Score
725
Attribute
36
FOC


Enchanted Ward
-4% damage from light and heavy attacks.

Nullifying Oblivion
When activated, Oblivion removes limited duration buffs from enemies within its radius and the cooldown is reduced by 10%.

Refreshing
Reduce max cooldowns by 4%.

Note : Use gems for protection based on mutation type Ruby - Fire, Aquamarine - Ice, Amethyst - Void, Amber - Nature

Gorgonite Pants
Medium
Crafted
Gear Score
725
Attribute
36
FOC


Enchanted Ward
-4% damage from light and heavy attacks.

Nullifying Oblivion
When activated, Oblivion removes limited duration buffs from enemies within its radius and the cooldown is reduced by 10%.

Refreshing
Reduce max cooldowns by 4%.

Note : Use gems for protection based on mutation type Ruby - Fire, Aquamarine - Ice, Amethyst - Void, Amber - Nature

Gorgonite Sandals
Light
Crafted
Gear Score
725
Attribute
36
INT


Enchanted Ward
-4% damage from light and heavy attacks.

Voracious Blade
While below 50% Health, heal for 34% of the damage dealt by Void Blade.

Refreshing
Reduce max cooldowns by 4%.

Note : Use gems for protection based on mutation type Ruby - Fire, Aquamarine - Ice, Amethyst - Void, Amber - Nature

Gorgonite Sandals
Light
Crafted
Gear Score
725
Attribute
36
INT


Enchanted Ward
-4% damage from light and heavy attacks.

Voracious Blade
While below 50% Health, heal for 34% of the damage dealt by Void Blade.

Refreshing
Reduce max cooldowns by 4%.

Note : Use gems for protection based on mutation type Ruby - Fire, Aquamarine - Ice, Amethyst - Void, Amber - Nature

Gorgonite Sandals
Light
Crafted
Gear Score
725
Attribute
36
INT


Enchanted Ward
-4% damage from light and heavy attacks.

Voracious Blade
While below 50% Health, heal for 34% of the damage dealt by Void Blade.

Refreshing
Reduce max cooldowns by 4%.

Note : Use gems for protection based on mutation type Ruby - Fire, Aquamarine - Ice, Amethyst - Void, Amber - Nature

Hoplite Life Staff
Named
Gear Score
725
Attribute
42
FOC


Blessed
+12% outgoing healing efficiency.

Fortifying Sacred Ground
Allies healed by Sacred Ground gain Fortify, increasing armor by 17% for 5s.

Refreshing Move
Light and Heavy attacks reduce your active weapon cooldowns by 2.5% (0.2s cooldown).


No Runeglass
Cut Pristine Diamond

Hoplite Life Staff
Named
Gear Score
725
Attribute
42
FOC


Blessed
+12% outgoing healing efficiency.

Fortifying Sacred Ground
Allies healed by Sacred Ground gain Fortify, increasing armor by 17% for 5s.

Refreshing Move
Light and Heavy attacks reduce your active weapon cooldowns by 2.5% (0.2s cooldown).


No Runeglass
Cut Pristine Diamond

Hoplite Life Staff
Named
Gear Score
725
Attribute
42
FOC


Blessed
+12% outgoing healing efficiency.

Fortifying Sacred Ground
Allies healed by Sacred Ground gain Fortify, increasing armor by 17% for 5s.

Refreshing Move
Light and Heavy attacks reduce your active weapon cooldowns by 2.5% (0.2s cooldown).


No Runeglass
Cut Pristine Diamond

Gorgonite Void Gauntlert
Crafted
Gear Score
725
Attribute
42
MAG


Distained Infliction
Potency of outgoing DoTs are increased by 15%. Hitting a target inflicted by your DoTs will extend the duration of them by 5% (1s Cooldown.) PvE Only: Deal +5% base damage against hostile AI inflicted with DoTs.

Sundering Stacks
Attack inflicts a stack of 4% Rend, each stack lasting 6s. (Max 5 stacks)

Putrefying Scream
Petrifying Scream inflicts Disease on hit, reducing the target's incoming healing by 43% and outgoing healing by 21% for 8s.


No Runeglass
Cut Pristine Diamond

Gorgonite Void Gauntlert
Crafted
Gear Score
725
Attribute
42
MAG


Distained Infliction
Potency of outgoing DoTs are increased by 15%. Hitting a target inflicted by your DoTs will extend the duration of them by 5% (1s Cooldown.) PvE Only: Deal +5% base damage against hostile AI inflicted with DoTs.

Sundering Stacks
Attack inflicts a stack of 4% Rend, each stack lasting 6s. (Max 5 stacks)

Putrefying Scream
Petrifying Scream inflicts Disease on hit, reducing the target's incoming healing by 43% and outgoing healing by 21% for 8s.


No Runeglass
Cut Pristine Diamond

Gorgonite Void Gauntlert
Crafted
Gear Score
725
Attribute
42
MAG


Distained Infliction
Potency of outgoing DoTs are increased by 15%. Hitting a target inflicted by your DoTs will extend the duration of them by 5% (1s Cooldown.) PvE Only: Deal +5% base damage against hostile AI inflicted with DoTs.

Sundering Stacks
Attack inflicts a stack of 4% Rend, each stack lasting 6s. (Max 5 stacks)

Putrefying Scream
Petrifying Scream inflicts Disease on hit, reducing the target's incoming healing by 43% and outgoing healing by 21% for 8s.


No Runeglass
Cut Pristine Diamond

Gorgon's Amulet
Light
Crafted
Gear Score
725
Attribute
36
MAG


Health
+7% max Health.

Empowered
Empower you apply lasts 34% longer.

Nature Protection
Receive 15% less Nature damage.

Note : Use gems for protection based on mutation type Ruby - Fire, Aquamarine - Ice, Amethyst - Void, Amber - Nature

Gorgon's Amulet
Light
Crafted
Gear Score
725
Attribute
36
MAG


Health
+7% max Health.

Empowered
Empower you apply lasts 34% longer.

Flame Protection
Receive 15% less Fire damage.

Note : Use gems for protection based on mutation type Ruby - Fire, Aquamarine - Ice, Amethyst - Void, Amber - Nature

Gorgon's Amulet
Light
Crafted
Gear Score
725
Attribute
36
MAG


Health
+7% max Health.

Empowered
Empower you apply lasts 34% longer.

Frozen Protection
Receive 15% less Ice damage.

Note : Use gems for protection based on mutation type Ruby - Fire, Aquamarine - Ice, Amethyst - Void, Amber - Nature

Gorgon's Amulet
Light
Crafted
Gear Score
725
Attribute
36
MAG


Health
+7% max Health.

Empowered
Empower you apply lasts 34% longer.

Void Protection
Receive 15% less Void damage.

Note : Use gems for protection based on mutation type Ruby - Fire, Aquamarine - Ice, Amethyst - Void, Amber - Nature

Gorgon's Amulet
Light
Crafted
Gear Score
725
Attribute
36
MAG


Health
+7% max Health.

Empowered
Empower you apply lasts 34% longer.

Strike Protection
Receive 15% less Strike damage.

Note : Use gems for protection based on mutation type Ruby - Fire, Aquamarine - Ice, Amethyst - Void, Amber - Nature

Gorgon's Amulet
Light
Crafted
Gear Score
725
Attribute
36
MAG


Health
+7% max Health.

Empowered
Empower you apply lasts 34% longer.

Slash Protection
Receive 15% less Slash damage.

Note : Use gems for protection based on mutation type Ruby - Fire, Aquamarine - Ice, Amethyst - Void, Amber - Nature

Gorgon's Amulet
Light
Crafted
Gear Score
725
Attribute
36
MAG


Health
+7% max Health.

Empowered
Empower you apply lasts 34% longer.

Thrust Protection
Receive 15% less Thrust damage.

Note : Use gems for protection based on mutation type Ruby - Fire, Aquamarine - Ice, Amethyst - Void, Amber - Nature

Gorgon's Amulet
Light
Crafted
Gear Score
725
Attribute
36
MAG


Health
+7% max Health.

Empowered
Empower you apply lasts 34% longer.

Nature Protection
Receive 15% less Nature damage.

Note : Use gems for protection based on mutation type Ruby - Fire, Aquamarine - Ice, Amethyst - Void, Amber - Nature

Gorgon's Amulet
Light
Crafted
Gear Score
725
Attribute
36
MAG


Health
+7% max Health.

Empowered
Empower you apply lasts 34% longer.

Flame Protection
Receive 15% less Fire damage.

Note : Use gems for protection based on mutation type Ruby - Fire, Aquamarine - Ice, Amethyst - Void, Amber - Nature

Gorgon's Amulet
Light
Crafted
Gear Score
725
Attribute
36
MAG


Health
+7% max Health.

Empowered
Empower you apply lasts 34% longer.

Frozen Protection
Receive 15% less Ice damage.

Note : Use gems for protection based on mutation type Ruby - Fire, Aquamarine - Ice, Amethyst - Void, Amber - Nature

Gorgon's Amulet
Light
Crafted
Gear Score
725
Attribute
36
MAG


Health
+7% max Health.

Empowered
Empower you apply lasts 34% longer.

Void Protection
Receive 15% less Void damage.

Note : Use gems for protection based on mutation type Ruby - Fire, Aquamarine - Ice, Amethyst - Void, Amber - Nature

Gorgon's Amulet
Light
Crafted
Gear Score
725
Attribute
36
MAG


Health
+7% max Health.

Empowered
Empower you apply lasts 34% longer.

Strike Protection
Receive 15% less Strike damage.

Note : Use gems for protection based on mutation type Ruby - Fire, Aquamarine - Ice, Amethyst - Void, Amber - Nature

Gorgon's Amulet
Light
Crafted
Gear Score
725
Attribute
36
MAG


Health
+7% max Health.

Empowered
Empower you apply lasts 34% longer.

Slash Protection
Receive 15% less Slash damage.

Note : Use gems for protection based on mutation type Ruby - Fire, Aquamarine - Ice, Amethyst - Void, Amber - Nature

Gorgon's Amulet
Light
Crafted
Gear Score
725
Attribute
36
MAG


Health
+7% max Health.

Empowered
Empower you apply lasts 34% longer.

Thrust Protection
Receive 15% less Thrust damage.

Note : Use gems for protection based on mutation type Ruby - Fire, Aquamarine - Ice, Amethyst - Void, Amber - Nature

Gorgon's Amulet
Light
Crafted
Gear Score
725
Attribute
36
MAG


Health
+7% max Health.

Empowered
Empower you apply lasts 34% longer.

Nature Protection
Receive 15% less Nature damage.

Note : Use gems for protection based on mutation type Ruby - Fire, Aquamarine - Ice, Amethyst - Void, Amber - Nature

Gorgon's Amulet
Light
Crafted
Gear Score
725
Attribute
36
MAG


Health
+7% max Health.

Empowered
Empower you apply lasts 34% longer.

Flame Protection
Receive 15% less Fire damage.

Note : Use gems for protection based on mutation type Ruby - Fire, Aquamarine - Ice, Amethyst - Void, Amber - Nature

Gorgon's Amulet
Light
Crafted
Gear Score
725
Attribute
36
MAG


Health
+7% max Health.

Empowered
Empower you apply lasts 34% longer.

Frozen Protection
Receive 15% less Ice damage.

Note : Use gems for protection based on mutation type Ruby - Fire, Aquamarine - Ice, Amethyst - Void, Amber - Nature

Gorgon's Amulet
Light
Crafted
Gear Score
725
Attribute
36
MAG


Health
+7% max Health.

Empowered
Empower you apply lasts 34% longer.

Void Protection
Receive 15% less Void damage.

Note : Use gems for protection based on mutation type Ruby - Fire, Aquamarine - Ice, Amethyst - Void, Amber - Nature

Gorgon's Amulet
Light
Crafted
Gear Score
725
Attribute
36
MAG


Health
+7% max Health.

Empowered
Empower you apply lasts 34% longer.

Strike Protection
Receive 15% less Strike damage.

Note : Use gems for protection based on mutation type Ruby - Fire, Aquamarine - Ice, Amethyst - Void, Amber - Nature

Gorgon's Amulet
Light
Crafted
Gear Score
725
Attribute
36
MAG


Health
+7% max Health.

Empowered
Empower you apply lasts 34% longer.

Slash Protection
Receive 15% less Slash damage.

Note : Use gems for protection based on mutation type Ruby - Fire, Aquamarine - Ice, Amethyst - Void, Amber - Nature

Gorgon's Amulet
Light
Crafted
Gear Score
725
Attribute
36
MAG


Health
+7% max Health.

Empowered
Empower you apply lasts 34% longer.

Thrust Protection
Receive 15% less Thrust damage.

Note : Use gems for protection based on mutation type Ruby - Fire, Aquamarine - Ice, Amethyst - Void, Amber - Nature

Gorgon's Amulet
Light
Crafted
Gear Score
725
Attribute
36
MAG


Health
+7% max Health.

Empowered
Empower you apply lasts 34% longer.

Nature Protection
Receive 15% less Nature damage.

Note : Use gems for protection based on mutation type Ruby - Fire, Aquamarine - Ice, Amethyst - Void, Amber - Nature

Gorgon's Amulet
Light
Crafted
Gear Score
725
Attribute
36
MAG


Health
+7% max Health.

Empowered
Empower you apply lasts 34% longer.

Flame Protection
Receive 15% less Fire damage.

Note : Use gems for protection based on mutation type Ruby - Fire, Aquamarine - Ice, Amethyst - Void, Amber - Nature

Gorgon's Amulet
Light
Crafted
Gear Score
725
Attribute
36
MAG


Health
+7% max Health.

Empowered
Empower you apply lasts 34% longer.

Frozen Protection
Receive 15% less Ice damage.

Note : Use gems for protection based on mutation type Ruby - Fire, Aquamarine - Ice, Amethyst - Void, Amber - Nature

Gorgon's Amulet
Light
Crafted
Gear Score
725
Attribute
36
MAG


Health
+7% max Health.

Empowered
Empower you apply lasts 34% longer.

Void Protection
Receive 15% less Void damage.

Note : Use gems for protection based on mutation type Ruby - Fire, Aquamarine - Ice, Amethyst - Void, Amber - Nature

Gorgon's Amulet
Light
Crafted
Gear Score
725
Attribute
36
MAG


Health
+7% max Health.

Empowered
Empower you apply lasts 34% longer.

Strike Protection
Receive 15% less Strike damage.

Note : Use gems for protection based on mutation type Ruby - Fire, Aquamarine - Ice, Amethyst - Void, Amber - Nature

Gorgon's Amulet
Light
Crafted
Gear Score
725
Attribute
36
MAG


Health
+7% max Health.

Empowered
Empower you apply lasts 34% longer.

Slash Protection
Receive 15% less Slash damage.

Note : Use gems for protection based on mutation type Ruby - Fire, Aquamarine - Ice, Amethyst - Void, Amber - Nature

Gorgon's Amulet
Light
Crafted
Gear Score
725
Attribute
36
MAG


Health
+7% max Health.

Empowered
Empower you apply lasts 34% longer.

Thrust Protection
Receive 15% less Thrust damage.

Note : Use gems for protection based on mutation type Ruby - Fire, Aquamarine - Ice, Amethyst - Void, Amber - Nature

Gorgon's Amulet
Light
Crafted
Gear Score
725
Attribute
36
MAG


Health
+7% max Health.

Empowered
Empower you apply lasts 34% longer.

Nature Protection
Receive 15% less Nature damage.

Note : Use gems for protection based on mutation type Ruby - Fire, Aquamarine - Ice, Amethyst - Void, Amber - Nature

Gorgon's Amulet
Light
Crafted
Gear Score
725
Attribute
36
MAG


Health
+7% max Health.

Empowered
Empower you apply lasts 34% longer.

Flame Protection
Receive 15% less Fire damage.

Note : Use gems for protection based on mutation type Ruby - Fire, Aquamarine - Ice, Amethyst - Void, Amber - Nature

Gorgon's Amulet
Light
Crafted
Gear Score
725
Attribute
36
MAG


Health
+7% max Health.

Empowered
Empower you apply lasts 34% longer.

Frozen Protection
Receive 15% less Ice damage.

Note : Use gems for protection based on mutation type Ruby - Fire, Aquamarine - Ice, Amethyst - Void, Amber - Nature

Gorgon's Amulet
Light
Crafted
Gear Score
725
Attribute
36
MAG


Health
+7% max Health.

Empowered
Empower you apply lasts 34% longer.

Void Protection
Receive 15% less Void damage.

Note : Use gems for protection based on mutation type Ruby - Fire, Aquamarine - Ice, Amethyst - Void, Amber - Nature

Gorgon's Amulet
Light
Crafted
Gear Score
725
Attribute
36
MAG


Health
+7% max Health.

Empowered
Empower you apply lasts 34% longer.

Strike Protection
Receive 15% less Strike damage.

Note : Use gems for protection based on mutation type Ruby - Fire, Aquamarine - Ice, Amethyst - Void, Amber - Nature

Gorgon's Amulet
Light
Crafted
Gear Score
725
Attribute
36
MAG


Health
+7% max Health.

Empowered
Empower you apply lasts 34% longer.

Slash Protection
Receive 15% less Slash damage.

Note : Use gems for protection based on mutation type Ruby - Fire, Aquamarine - Ice, Amethyst - Void, Amber - Nature

Gorgon's Amulet
Light
Crafted
Gear Score
725
Attribute
36
MAG


Health
+7% max Health.

Empowered
Empower you apply lasts 34% longer.

Thrust Protection
Receive 15% less Thrust damage.

Note : Use gems for protection based on mutation type Ruby - Fire, Aquamarine - Ice, Amethyst - Void, Amber - Nature

Gorgon's Amulet
Light
Crafted
Gear Score
725
Attribute
36
MAG


Health
+7% max Health.

Empowered
Empower you apply lasts 34% longer.

Nature Protection
Receive 15% less Nature damage.

Note : Use gems for protection based on mutation type Ruby - Fire, Aquamarine - Ice, Amethyst - Void, Amber - Nature

Gorgon's Amulet
Light
Crafted
Gear Score
725
Attribute
36
MAG


Health
+7% max Health.

Empowered
Empower you apply lasts 34% longer.

Flame Protection
Receive 15% less Fire damage.

Note : Use gems for protection based on mutation type Ruby - Fire, Aquamarine - Ice, Amethyst - Void, Amber - Nature

Gorgon's Amulet
Light
Crafted
Gear Score
725
Attribute
36
MAG


Health
+7% max Health.

Empowered
Empower you apply lasts 34% longer.

Frozen Protection
Receive 15% less Ice damage.

Note : Use gems for protection based on mutation type Ruby - Fire, Aquamarine - Ice, Amethyst - Void, Amber - Nature

Gorgon's Amulet
Light
Crafted
Gear Score
725
Attribute
36
MAG


Health
+7% max Health.

Empowered
Empower you apply lasts 34% longer.

Void Protection
Receive 15% less Void damage.

Note : Use gems for protection based on mutation type Ruby - Fire, Aquamarine - Ice, Amethyst - Void, Amber - Nature

Gorgon's Amulet
Light
Crafted
Gear Score
725
Attribute
36
MAG


Health
+7% max Health.

Empowered
Empower you apply lasts 34% longer.

Strike Protection
Receive 15% less Strike damage.

Note : Use gems for protection based on mutation type Ruby - Fire, Aquamarine - Ice, Amethyst - Void, Amber - Nature

Gorgon's Amulet
Light
Crafted
Gear Score
725
Attribute
36
MAG


Health
+7% max Health.

Empowered
Empower you apply lasts 34% longer.

Slash Protection
Receive 15% less Slash damage.

Note : Use gems for protection based on mutation type Ruby - Fire, Aquamarine - Ice, Amethyst - Void, Amber - Nature

Gorgon's Amulet
Light
Crafted
Gear Score
725
Attribute
36
MAG


Health
+7% max Health.

Empowered
Empower you apply lasts 34% longer.

Thrust Protection
Receive 15% less Thrust damage.

Note : Use gems for protection based on mutation type Ruby - Fire, Aquamarine - Ice, Amethyst - Void, Amber - Nature

Gorgon's Amulet
Light
Crafted
Gear Score
725
Attribute
36
MAG


Health
+7% max Health.

Empowered
Empower you apply lasts 34% longer.

Nature Protection
Receive 15% less Nature damage.

Note : Use gems for protection based on mutation type Ruby - Fire, Aquamarine - Ice, Amethyst - Void, Amber - Nature

Gorgon's Amulet
Light
Crafted
Gear Score
725
Attribute
36
MAG


Health
+7% max Health.

Empowered
Empower you apply lasts 34% longer.

Flame Protection
Receive 15% less Fire damage.

Note : Use gems for protection based on mutation type Ruby - Fire, Aquamarine - Ice, Amethyst - Void, Amber - Nature

Gorgon's Amulet
Light
Crafted
Gear Score
725
Attribute
36
MAG


Health
+7% max Health.

Empowered
Empower you apply lasts 34% longer.

Frozen Protection
Receive 15% less Ice damage.

Note : Use gems for protection based on mutation type Ruby - Fire, Aquamarine - Ice, Amethyst - Void, Amber - Nature

Gorgon's Amulet
Light
Crafted
Gear Score
725
Attribute
36
MAG


Health
+7% max Health.

Empowered
Empower you apply lasts 34% longer.

Void Protection
Receive 15% less Void damage.

Note : Use gems for protection based on mutation type Ruby - Fire, Aquamarine - Ice, Amethyst - Void, Amber - Nature

Gorgon's Amulet
Light
Crafted
Gear Score
725
Attribute
36
MAG


Health
+7% max Health.

Empowered
Empower you apply lasts 34% longer.

Strike Protection
Receive 15% less Strike damage.

Note : Use gems for protection based on mutation type Ruby - Fire, Aquamarine - Ice, Amethyst - Void, Amber - Nature

Gorgon's Amulet
Light
Crafted
Gear Score
725
Attribute
36
MAG


Health
+7% max Health.

Empowered
Empower you apply lasts 34% longer.

Slash Protection
Receive 15% less Slash damage.

Note : Use gems for protection based on mutation type Ruby - Fire, Aquamarine - Ice, Amethyst - Void, Amber - Nature

Gorgon's Amulet
Light
Crafted
Gear Score
725
Attribute
36
MAG


Health
+7% max Health.

Empowered
Empower you apply lasts 34% longer.

Thrust Protection
Receive 15% less Thrust damage.

Note : Use gems for protection based on mutation type Ruby - Fire, Aquamarine - Ice, Amethyst - Void, Amber - Nature

Gorgon's Amulet
Light
Crafted
Gear Score
725
Attribute
36
MAG


Health
+7% max Health.

Empowered
Empower you apply lasts 34% longer.

Nature Protection
Receive 15% less Nature damage.

Note : Use gems for protection based on mutation type Ruby - Fire, Aquamarine - Ice, Amethyst - Void, Amber - Nature

Gorgon's Amulet
Light
Crafted
Gear Score
725
Attribute
36
MAG


Health
+7% max Health.

Empowered
Empower you apply lasts 34% longer.

Flame Protection
Receive 15% less Fire damage.

Note : Use gems for protection based on mutation type Ruby - Fire, Aquamarine - Ice, Amethyst - Void, Amber - Nature

Gorgon's Amulet
Light
Crafted
Gear Score
725
Attribute
36
MAG


Health
+7% max Health.

Empowered
Empower you apply lasts 34% longer.

Frozen Protection
Receive 15% less Ice damage.

Note : Use gems for protection based on mutation type Ruby - Fire, Aquamarine - Ice, Amethyst - Void, Amber - Nature

Gorgon's Amulet
Light
Crafted
Gear Score
725
Attribute
36
MAG


Health
+7% max Health.

Empowered
Empower you apply lasts 34% longer.

Void Protection
Receive 15% less Void damage.

Note : Use gems for protection based on mutation type Ruby - Fire, Aquamarine - Ice, Amethyst - Void, Amber - Nature

Gorgon's Amulet
Light
Crafted
Gear Score
725
Attribute
36
MAG


Health
+7% max Health.

Empowered
Empower you apply lasts 34% longer.

Strike Protection
Receive 15% less Strike damage.

Note : Use gems for protection based on mutation type Ruby - Fire, Aquamarine - Ice, Amethyst - Void, Amber - Nature

Gorgon's Amulet
Light
Crafted
Gear Score
725
Attribute
36
MAG


Health
+7% max Health.

Empowered
Empower you apply lasts 34% longer.

Slash Protection
Receive 15% less Slash damage.

Note : Use gems for protection based on mutation type Ruby - Fire, Aquamarine - Ice, Amethyst - Void, Amber - Nature

Gorgon's Amulet
Light
Crafted
Gear Score
725
Attribute
36
MAG


Health
+7% max Health.

Empowered
Empower you apply lasts 34% longer.

Thrust Protection
Receive 15% less Thrust damage.

Note : Use gems for protection based on mutation type Ruby - Fire, Aquamarine - Ice, Amethyst - Void, Amber - Nature

Gorgon's Ring
Light
Crafted
Gear Score
725
Attribute
36
MAG


Hearty
+10% max Stamina.

Keen Awareness
+7% critical chance.

sacred
+9.5% outgoing healing efficiency.

Note : Use gems for protection based on mutation type Ruby - Fire, Aquamarine - Ice, Amethyst - Void, Amber - Nature

Gorgon's Ring
Light
Crafted
Gear Score
725
Attribute
36
MAG


Hearty
+10% max Stamina.

Keen Awareness
+7% critical chance.

sacred
+9.5% outgoing healing efficiency.

Note : Use gems for protection based on mutation type Ruby - Fire, Aquamarine - Ice, Amethyst - Void, Amber - Nature

Gorgon's Ring
Light
Crafted
Gear Score
725
Attribute
36
MAG


Hearty
+10% max Stamina.

Keen Awareness
+7% critical chance.

sacred
+9.5% outgoing healing efficiency.

Note : Use gems for protection based on mutation type Ruby - Fire, Aquamarine - Ice, Amethyst - Void, Amber - Nature

Hoplite Earring
Light
Named
Gear Score
725
Attribute
36
MAG


Refreshing Toast
Potions cooldown 10% faster.

Refreshing
Reduce max cooldowns by 4%.
Empowering Toast
On Potion Drink: Gain 10% Empower for 8s (10s cooldown).

Note : Use gems for protection based on mutation type Ruby - Fire, Aquamarine - Ice, Amethyst - Void, Amber - Nature

Hoplite Earring
Light
Named
Gear Score
725
Attribute
36
MAG


Refreshing Toast
Potions cooldown 10% faster.

Refreshing
Reduce max cooldowns by 4%.
Empowering Toast
On Potion Drink: Gain 10% Empower for 8s (10s cooldown).

Note : Use gems for protection based on mutation type Ruby - Fire, Aquamarine - Ice, Amethyst - Void, Amber - Nature

Hoplite Earring
Light
Named
Gear Score
725
Attribute
36
MAG


Refreshing Toast
Potions cooldown 10% faster.

Refreshing
Reduce max cooldowns by 4%.
Empowering Toast
On Potion Drink: Gain 10% Empower for 8s (10s cooldown).

Note : Use gems for protection based on mutation type Ruby - Fire, Aquamarine - Ice, Amethyst - Void, Amber - Nature

5. Endgame Attributes


5. Endgame Attributes


5. Endgame Attributes

You can choose which two extra attribute can go to 25. Can be str+dex, str+con or dex+con. You also can spend all extra points into focus or into con to get more survivability if needed
STR
25
DEX
25
INT
350
FOC
300
CON
15
STR
25
DEX
25
INT
350
FOC
300
CON
15
STR
25
DEX
25
INT
350
FOC
300
CON
15

6. Skill Tree


6. Skill Tree


6. Skill Tree


7. Abilities


7. Abilities


7. Abilities


Sacred Ground
Create an area on the ground with a 3m radius that lasts for 12s. Allies in the area are healed for 16% weapon damage every second.
(This effect cannot be dispelled.)
Costs 15 mana.


Sacred Ground
Create an area on the ground with a 3m radius that lasts for 12s. Allies in the area are healed for 16% weapon damage every second.
(This effect cannot be dispelled.)
Costs 15 mana.


Sacred Ground
Create an area on the ground with a 3m radius that lasts for 12s. Allies in the area are healed for 16% weapon damage every second.
(This effect cannot be dispelled.)
Costs 15 mana.


Beacon
Shoot out a light projectile that deals 146% weapon damage to enemies, attaches to its target and heals all allies in a 3m radius for 16% weapon damage each second for 10s.
(This effect cannot be dispelled.)
Costs 16 mana.


Beacon
Shoot out a light projectile that deals 146% weapon damage to enemies, attaches to its target and heals all allies in a 3m radius for 16% weapon damage each second for 10s.
(This effect cannot be dispelled.)
Costs 16 mana.


Beacon
Shoot out a light projectile that deals 146% weapon damage to enemies, attaches to its target and heals all allies in a 3m radius for 16% weapon damage each second for 10s.
(This effect cannot be dispelled.)
Costs 16 mana.


Orb of Protection
Shoot out a light projectile that grants 20% fortify for 10s, heals an ally for 8% of weapon damage, and deals 146% weapon damage when it hits an enemy. (Fortify increases armor.)
Costs 16 mana.


Orb of Protection
Shoot out a light projectile that grants 20% fortify for 10s, heals an ally for 8% of weapon damage, and deals 146% weapon damage when it hits an enemy. (Fortify increases armor.)
Costs 16 mana.


Orb of Protection
Shoot out a light projectile that grants 20% fortify for 10s, heals an ally for 8% of weapon damage, and deals 146% weapon damage when it hits an enemy. (Fortify increases armor.)
Costs 16 mana.


Divine Embrace
Creates a 0.5m radius area around an ally or a location on the ground that Heals the target within for 120% weapon damage.
Costs 25 mana.


Divine Embrace
Creates a 0.5m radius area around an ally or a location on the ground that Heals the target within for 120% weapon damage.
Costs 25 mana.


Divine Embrace
Creates a 0.5m radius area around an ally or a location on the ground that Heals the target within for 120% weapon damage.
Costs 25 mana.


Light's Embrace
Creates a 0.5m radius area around an ally or a location on the ground that Heals the target within for 80% weapon damage + 20% more for each life staff buff on that target.
Costs 18 mana.


Light's Embrace
Creates a 0.5m radius area around an ally or a location on the ground that Heals the target within for 80% weapon damage + 20% more for each life staff buff on that target.
Costs 18 mana.


Light's Embrace
Creates a 0.5m radius area around an ally or a location on the ground that Heals the target within for 80% weapon damage + 20% more for each life staff buff on that target.
Costs 18 mana.


Splash of Light
You and all group members within 25m are healed for 80% weapon damage.
Costs 15 mana.


Splash of Light
You and all group members within 25m are healed for 80% weapon damage.
Costs 15 mana.


Splash of Light
You and all group members within 25m are healed for 80% weapon damage.
Costs 15 mana.


Oblivion
Summon a 5m radius circular rift of Void energy at your feet for 6s that deals 28% weapon damage per second to enemies and grants empower to self and friendlies, increasing damage by 15%.
(This effect cannot be dispelled.)
Costs 30 mana.


Oblivion
Summon a 5m radius circular rift of Void energy at your feet for 6s that deals 28% weapon damage per second to enemies and grants empower to self and friendlies, increasing damage by 15%.
(This effect cannot be dispelled.)
Costs 30 mana.


Oblivion
Summon a 5m radius circular rift of Void energy at your feet for 6s that deals 28% weapon damage per second to enemies and grants empower to self and friendlies, increasing damage by 15%.
(This effect cannot be dispelled.)
Costs 30 mana.


Void Blade
Summon a blade of Void energy that converts your ranged light and heavy attacks to melee light and heavy attacks.
Tap Basic Attack to perform a quick slash that deals 100% weapon damage or hold to perform a thrust attack that deals 150% weapon damage.
Both attacks inflict Disintegrate on successful hits, dealing 5% weapon damage per second and reducing target's armor by 10% for 8s and stacks up to 3 times.
Costs 20 mana.


Petrifying Scream
Unleash a Void-infused scream, dealing 65% weapon damage, staggering and inflicting root to enemies 5m in front of you. Disables enemy movement for 2s.
Costs 25 mana.
Taunt Gem Compatible: If you have a Carnelian gem equipped in your void gauntlet, hits with this ability inflict taunt for 4s. (Taunt causes monsters to focus only on you.)


Baleful Tether
Fire a projectile dealing 100% weapon damage that tethers you to an enemy for 10s, weakening it and empowering you by 20%. The tether ends early if the target moves beyond 20m.
Costs 25 mana.
(Baleful Tether's Empower and Weaken can not be dispelled, and the tether remains active after weapon swap.)


Orb of Decay
Fire an unblockable orb that passes through enemies, deals 90% weapon damage and inflicts Disintegrate, dealing 5% weapon damage per second and reducing target's armor by 10% for 8s. (Stacks up to 3 times.)
At max range, it transforms into a healing orb and returns, healing friendlies for 20% weapon damage per second for 5s. (Healing scales exclusively with Focus.)
Costs 20 mana.


Essence Rupture
Fire a projectile dealing 100% weapon damage that inflicts Essence Rupture for 10s, healing anyone that hits the target for 20% of the damage done. (Does not apply to damage-over-time or damage done to inanimate objects.)
Costs 25 mana.


Essence Rupture
Fire a projectile dealing 100% weapon damage that inflicts Essence Rupture for 10s, healing anyone that hits the target for 20% of the damage done. (Does not apply to damage-over-time or damage done to inanimate objects.)
Costs 25 mana.


Essence Rupture
Fire a projectile dealing 100% weapon damage that inflicts Essence Rupture for 10s, healing anyone that hits the target for 20% of the damage done. (Does not apply to damage-over-time or damage done to inanimate objects.)
Costs 25 mana.


8. Offhand Weapon


8. Offhand Weapon


8. Offhand Weapon

Offhand Options (Situational)
There is not much secondary option for a healer
Musket (Accelerated Traps) – Useful for speeding up movement between pulls in faster runs.
Flail - if strategy requires

9. Consumables


9. Consumables


9. Consumables

Food, potions and other

Infused Corrupted Coating
Gives +15% additional damage against Corrupted. Lasts for 40 minutes. Only one Coating may be applied at a time. Coatings stack with Weapon Traits.

Infused Corrupted Coating
Gives +15% additional damage against Corrupted. Lasts for 40 minutes. Only one Coating may be applied at a time. Coatings stack with Weapon Traits.

Infused Corrupted Coating
Gives +15% additional damage against Corrupted. Lasts for 40 minutes. Only one Coating may be applied at a time. Coatings stack with Weapon Traits.
Coatings are important part of your damage. Research which mobs you fight in expeditions and prepare coatings. Sometimes you might need to use few different coatings during the expedition

Powerful Honing Stone
Increases weapon damage by 7% for 40 minutes.

Powerful Honing Stone
Increases weapon damage by 7% for 40 minutes.

Powerful Honing Stone
Increases weapon damage by 7% for 40 minutes.
7% empower for any of your weapon attack

Blackened Lava Barb with Corn Succotash
Increase Focus by 48 for 40 minutes. Your health slowly recovers while under these effects.

Blackened Lava Barb with Corn Succotash
Increase Focus by 48 for 40 minutes. Your health slowly recovers while under these effects.

Blackened Lava Barb with Corn Succotash
Increase Focus by 48 for 40 minutes. Your health slowly recovers while under these effects.
Food is important. Without it you will not be able to reach main checkpoints in attributes. So if after you prepared your gear you missing attributes it's probably a food. Don't cheap out. Buy the highest tier

Infused Corrupted Ward
Increases damage absorption from Corrupted by 10% for 40 minutes.

Infused Corrupted Ward
Increases damage absorption from Corrupted by 10% for 40 minutes.

Infused Corrupted Ward
Increases damage absorption from Corrupted by 10% for 40 minutes.
Ward potions - your protection. Research which mobs you fight in expeditions and prepare ward potions. Sometimes you might need to use few different ward potions during the expedition

Desert Sunrise
Reduce the Duration of DOTs (damage over time) by 17.5% for 40 minutes. Your health slowly recovers while under these effects.

Desert Sunrise
Reduce the Duration of DOTs (damage over time) by 17.5% for 40 minutes. Your health slowly recovers while under these effects.

Desert Sunrise
Reduce the Duration of DOTs (damage over time) by 17.5% for 40 minutes. Your health slowly recovers while under these effects.
Helps to medigate DoT damage in expeditions

Infused Grit Potion
Become uninterruptible to staggers for 10s.

Infused Grit Potion
Become uninterruptible to staggers for 10s.

Infused Grit Potion
Become uninterruptible to staggers for 10s.
Might be usefull in some specific scenarious. E.G fire explosive mutations

10. Protection


10. Protection


10. Protection

How to gem up
Elemental resistance is capped at 50%. Keep this in mind when slotting gems for mutations or raids. Your amulet and gems combined should not exceed 50% resistance in total for optimal protection.
If you don’t have an amulet with a 15% resistance perk, there’s an easy solution: slot 8 gems into your armor and jewelry sockets to almost fully cover the mutation element.
Remember, some bosses deal unique elemental damage that isn’t affected by the mutation type. Check NWBuddy before entering an expedition to ensure you’re using the best protection. It’s a good idea to bring a few extra gems, amulets, or even a secondary gear set specifically for boss fights—it’ll make your experience much smoother.
Find your own optimal protection for specific encounters. Some base examples are bellow
If you playing Old Crown variations gem distribution can be a bit different. I'll leave it to yoursefl to figure it out :) Stick to main principles
- protect from expedition elemental damage
- protect from boss damage types
- don't go over 50% cap in one resistance (keep in mind that absorbtion potions counts toward this cap)
Attuned Leather Pants variation With amulet 15% Protection
x5

Cut Pristine Amber
x2

Cut Pristine Opal
x1

Cut Pristine Onyx
Total:
50% Nature resistance
5 % Elemental resistance
2,5 % Physical resistance or 5% for slash/strike/thrust
Total:
50% Nature resistance
5 % Elemental resistance
2,5 % Physical resistance or 5% for slash/strike/thrust
x5

Cut Pristine Amethyst
x2

Cut Pristine Opal
x1

Cut Pristine Onyx
Total:
50% Void resistance
5 % Elemental resistance
2,5 % Physical resistance or 5% for slash/strike/thrust
Total:
50% Void resistance
5 % Elemental resistance
2,5 % Physical resistance or 5% for slash/strike/thrust
x5
Cut Pristine Ruby
x2

Cut Pristine Opal
x1

Cut Pristine Onyx
Total:
50% Fire resistance
5 % Elemental resistance
2,5 % Physical resistance or 5% for slash/strike/thrust
Total:
50% Fire resistance
5 % Elemental resistance
2,5 % Physical resistance or 5% for slash/strike/thrust
x5

Cut Pristine Aquamarine
x2

Cut Pristine Opal
x1

Cut Pristine Onyx
Total:
50% Ice resistance
5 % Elemental resistance
2,5 % Physical resistance or 5% for slash/strike/thrust
Total:
50% Ice resistance
5 % Elemental resistance
2,5 % Physical resistance or 5% for slash/strike/thrust
x6

Cut Pristine Emerald
x2

Cut Pristine Onyx
Total: 50% Thrust resistance
Total: 50% Thrust resistance
x6

Cut Pristine Jasper
x2

Cut Pristine Onyx
Total: 50% Strike resistance
Total: 50% Strike resistance
x6

Cut Pristine Moonstone
x2

Cut Pristine Onyx
Total: 50% Slash resistance
Total: 50% Slash resistance
Attuned Leather Pants variation Without amulet 15% Protection
x8

Cut Pristine Amber
Total: 48% Nature resistance
Total: 48% Nature resistance
x8

Cut Pristine Amethyst
Total: 48% Void resistance
Total: 48% Void resistance
x8

Cut Pristine Aquamarine
Total: 48% Ice resistance
Total: 48% Ice resistance
x8

Cut Pristine Ruby
Total: 48% Fire resistance
Total: 48% Fire resistance

11. Heaartrune


11. Heaartrune


11. Heaartrune

Heartrunes variations

Stalwart Heartrune of Bile Bomb
Spit out a glob of corrosive bile that creates a 3.5m radius disease cloud on impact that lingers for 3s. Enemies that enter the cloud are afflicted with a debuff that deals 100% heartrune damage per second and reduces incoming healing by 30% and outgoing healing by 15% for 8s. Cloud sticks to enemies on direct hits.
Crippling Bile: Inflicts Slow on hit, reducing the target's movement speed by 20% for 3s.
Mending Bile: Players who hit the afflicted targets are healed for 20% of the damage they deal. Reduce incoming healing reduction to 15% and outgoing to 7.5%. Ability no longer applies a DoT.
Healing, DoTs, Antieheal

12. Gameplay


12. Gameplay


12. Gameplay

PvE Healer Role Responsibilities – Life Staff + Void Gauntlet
In group PvE content (mutations, raids, trials), the healer’s job goes far beyond just topping off health bars. When running a Life Staff + Void Gauntlet build, you’re both a sustain backbone and a debuff/damage support. Here's what you're expected to do:
Keep the Team Alive with AoE Heals
Use Sacred Ground to maintain steady healing in a fixed area—especially under the tank.
Cast Beacon on bosses (or allies) to provide healing-over-time in a moving fight.
Use Orb of Protection to apply Fortify and extra healing. Great for pre-fight prep or as a filler heal.
Position yourself carefully to get maximum value out of AoE heals—try to cover multiple players at once.
Support the Group with Buffs
Sacred Ground and Orb of Protection both provide Fortify, helping reduce incoming damage.
Empowering Beacon gives DPS players a damage buff.
Your healing kit doesn't just restore health—it also boosts your team’s defensive uptime.
Debuff & Damage with Void Gauntlet
Drop Oblivion on clumped mobs or bosses to:
Grant empower to allies standing in it.
Increase Stamina Regen
Use Void Blade—applies Weaken, Disintegrate, and adds decent melee damage.
Spam Scream (Petrifying Scream) to:
Stagger and root enemies in AoE.
apply desease if running putrefying scream perk
Weave in Essence Rupture (if slotted) for group healing on hit—pairs excellently with AoE-heavy fights.
Communicate & Adapt
Call out when Oblivion is down for DPS to step in.
Adjust your priority: more healing during high-damage phases, more VG uptime during trash pulls or downtime.
Adapt to group composition—if DD players are less expirienced, focus more on healing. If survivability is high, lean more into damage and debuffs.
Summary
The Life Staff + Void Gauntlet healer is a hybrid PvE support role focused on:
Sustained AoE healing (Sacred Ground, Beacon, Orb)
Buffing allies (Fortify, Empower)
Debuffing enemies (Rend, Weaken)
Rooting and staggering dangerous mobs (Scream)
Supplementing DPS during downtime
This playstyle brings high utility and value to any group, especially in mutation content, where every second of uptime and every percent of damage reduction or output matters.

